Side; Head & Tail Lights
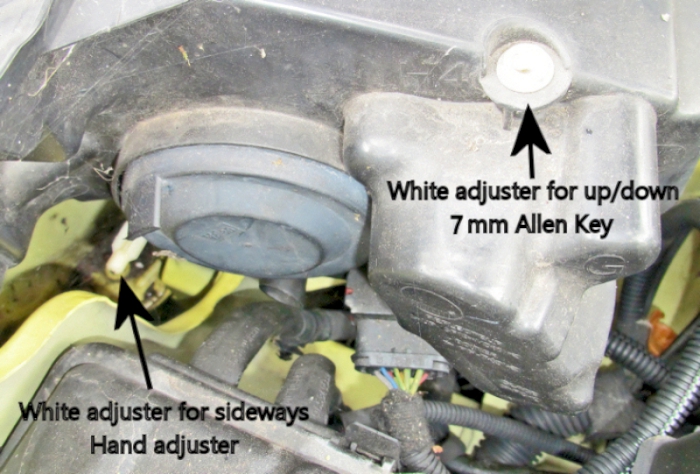
these are the two adjusters for the headlights; they are very obvious being white
the hand adjusters for left/right are a little difficult to turn, but the ones most used for up/down ideally require a 7mm Allen key (a size not commonly available in Allen Key kits) but a 6mm will fit and no doubt a screwdriver of the right size would work.
Best always to set up on a garage beam setter as these determine whether you get a pass or not!
Headlight wiring

nothing is simple these days - this annotated drawing shows only the wiring for the headlights!
the headlights are fed from the Systems Interface board (BSI) in the glovebox.
Dip beams failed
Could be both dip filaments burnt out - that would be the most likely. Each dip filament is fed by an individual fuse see here but it would be very unlikely they would both blow.
Another possibility would be a faulty column switch - but check the bulbs first.
Living in a country area, I am always amazed at how many cars creep about with only one headlight working - only needs the other to fail and they will be plunged into darkness!
The cause is quite often the auto-headlights circuit which bring the headlights on as it gets darker. We've all seen them - headlights blazing on a dull afternoon - without realising that the highly stressed bulbs have a limited burn life and are certain to fail prematurely. Moral - switch off the auto-headlights!
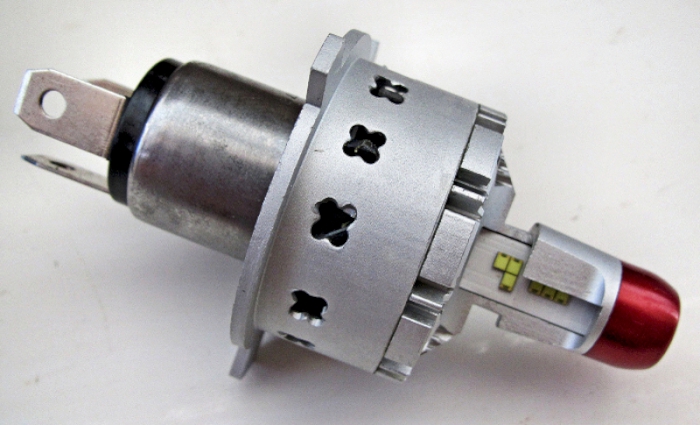
Changing front light bulbs
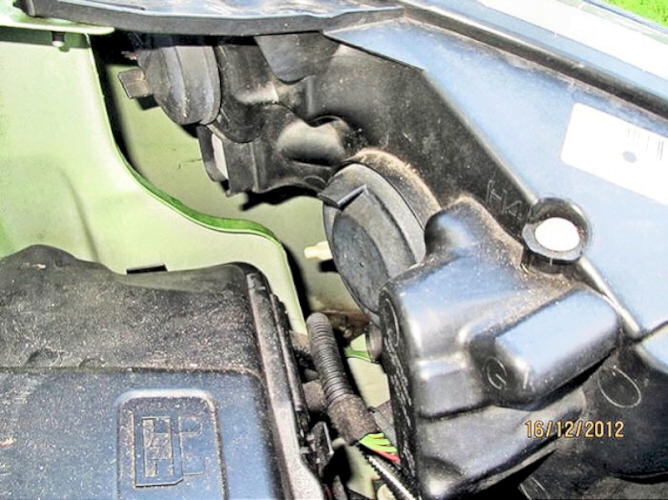
access to the rear of the headlight units looks good after taking off the rubber dust covers.
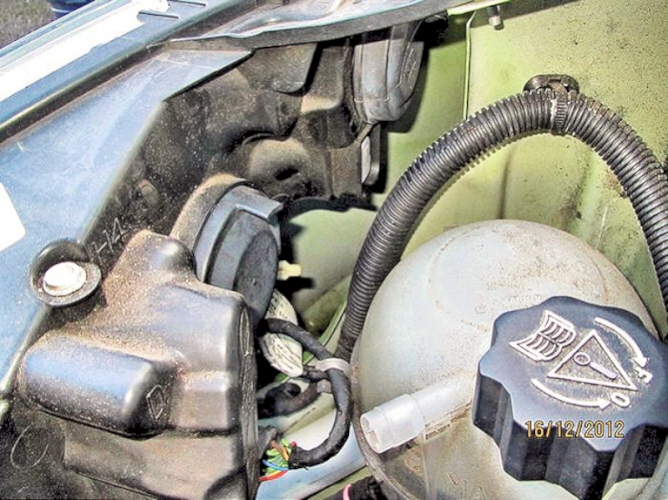
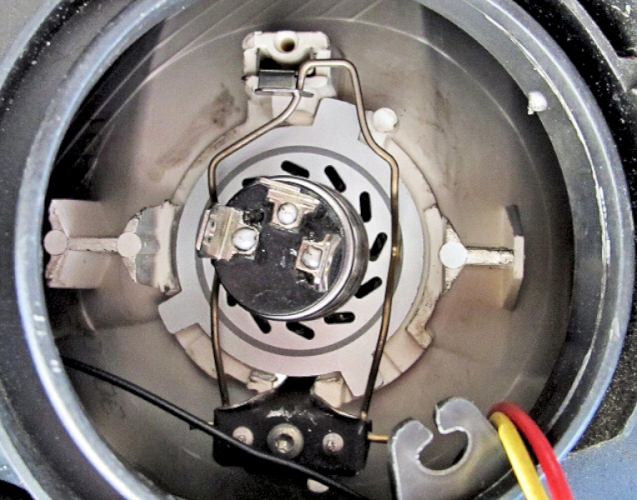
BUT the headlight bulbs are well inset; they are held in place by thin springy wire and can require some care and patience to replace.
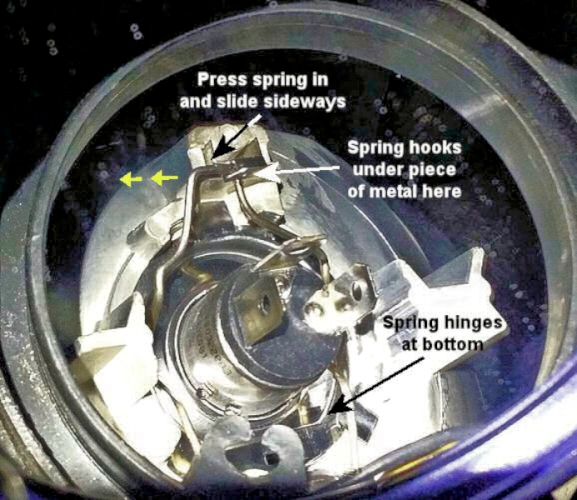
Press on the wire where shown and slide it sideways - the spring wire is hinged at the bottom so pull it back to release the bulb. Use a torch and mirror to see what you are doing in there!
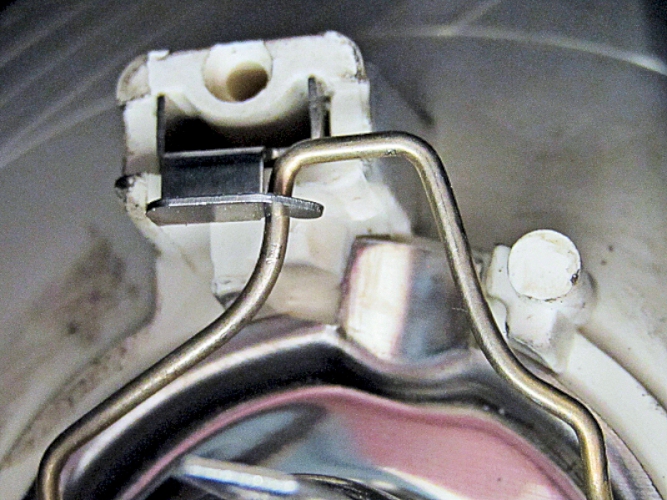
The springy wire is surprisingly strong and in a confined space, you might find it difficult to unclip.
I use Osram Night Breaker Plus H4 bulbs which seem to last well; others prefer Philips.
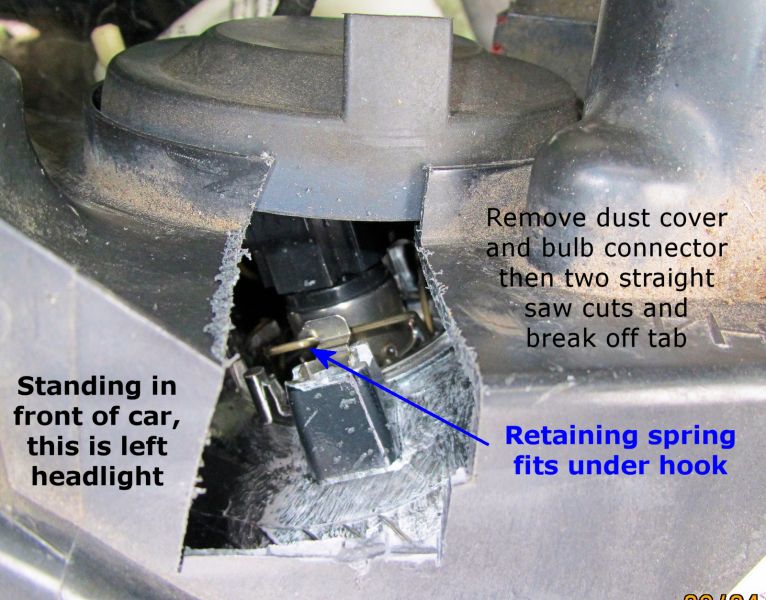
PLAN B - might be to cut away part of the plastic housing. Use straight cuts with a junior hacksaw after removing the dust cover and bulb wiring socket. NOW you can see what you are doing - and maybe use a screwdriver to help unhook the wire and remove/replace the bulb.
Crazed or Milky Headlight
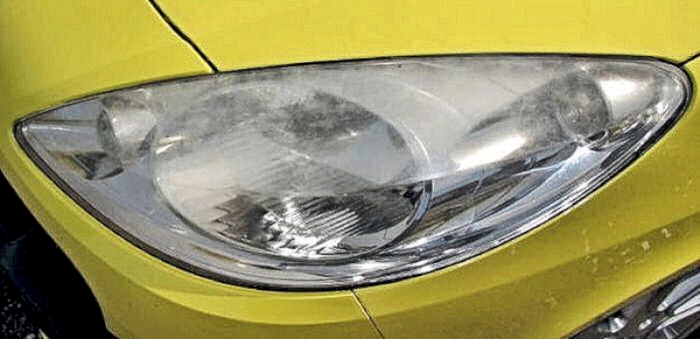
If your headlights look like this, the UV protection has been washed off after repeated washing and the lens attacked by UV from the sun. I have seen many worse but even these had a poor diffused light output and are potential MOT failures.
First reaction may be to replace the headlight, but there is no need to do so as the milkiness can be polished out
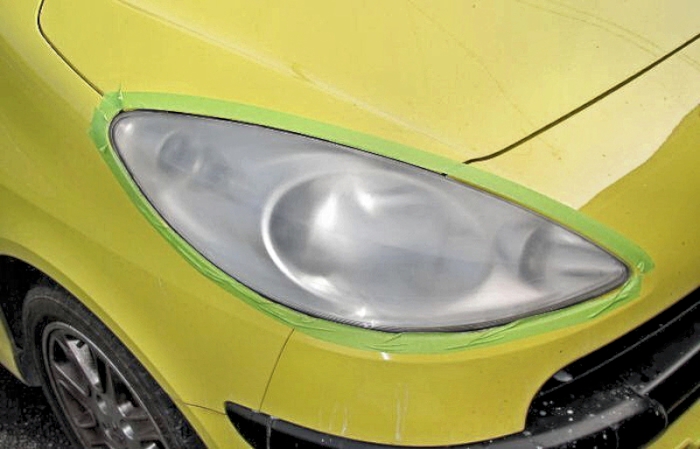
They can be carefully polished out starting with 800 grit wet & dry emery paper - you have to be brave; it will work if you are patient.
You can use an electric drill, but be careful not to overheat the plastic. I did mine by hand; the headlamps are at convenient height when sitting on a chair on a fine day!
Good “how-to” video on this page Auto-glym Headlight Restore - there are many others on the market.
I carefully worked down using ever-finer grades to finish with 7,000 grit wet & dry (with plenty of water and a drop of washing up liquid). Change the water between each grade; you won't want any coarser grit getting back onto the soft plastic.
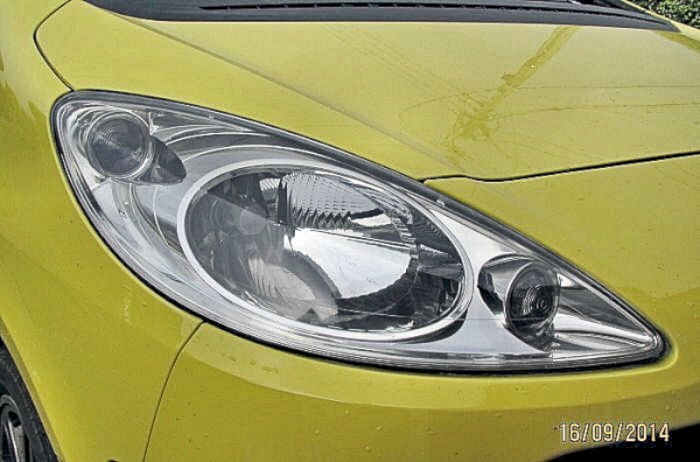
. . . and then a good polish up - I used Meguiar's G2970EU Two-Step Car Headlight Restoration Kit with Headlight Cleaner and Headlight Protectant (other similar products are available) which takes out the last of the fogging from the 7,000 grit paper very well.
. . . and finally a double application of anti-UV polish. I use this which seems to work well.

Various kits suggest using an electric drill, but I found that hand rubbing and patience were better controlled. The end results look as good as new.
OR - you could change the headlight (not a simple undertaking)
The workshop CD's suggest extensive dismantling of the front end.
However Yves suggests that “You only need to take 2 parts off as far as he remembers: 4 torx screws under the bonnet, then the thing with the Peugeot logo comes off, and then 2 more torx screws and 4 torx bolts and you should have enough access to take the headlight off.”
Sidelights
I have fitted LED sidelights at the front. They are much brighter and easier to see especially as the light fades. I fitted Osram w5w led warm at the front. Not changed any others to LED; as they seem perfectly adequate.
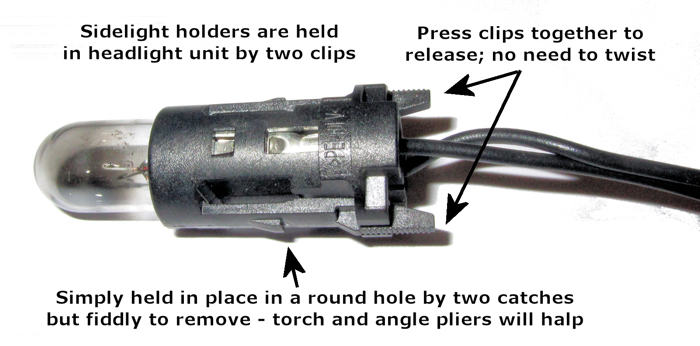
You may need a torch and some patience to unclip and pull out the sidelight bulbs. No need to twist - just press the clips together and pull the bulb holder out (but easier said than done!).
Sidelight wiring
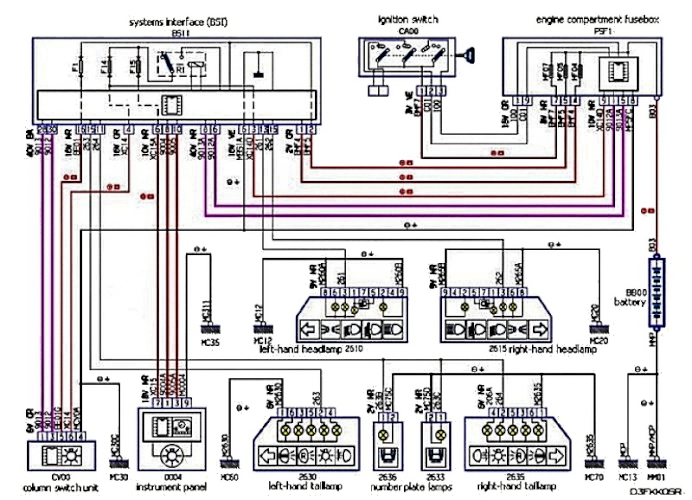
- nothing is simple these days - this annotated drawing shows only the wiring for the sidelights!
- the front and rear sidelights are fed from the Systems Interface board (BSI) in the glovebox.
- The right-hand TAIL lights are fed by wire 264 which ALSO feeds the number-plate lamps.
- The left-hand tail light is fed on its own by wire 263
- The right-hand front sidelight is fed by wire 262 from the BSI and the left-hand sidelight is fed by wire 261 from the BSI
- According to the Drivers' Handbook, the number-plate lamps are fed from fuse 22 in the BSI - it could just be that the sidelights are fed from this same fuse - but they are not mentioned.

the Systems Interface (BSI) is a wonder in itself - I'll leave the reader to work out what does (or should do) what.
Side repeater lights
I replaced mine with the LED version of these
According to the Drivers' Handbook - these simply slide forward against springy plastic and then pull out at the front: I found it better to use a plastic pry tool like one out of this kit to carefully lever the opposite end out (careful with the paint!) once I knew where the springy end was. As they fit either way, one of my side repeaters was opposite to the other!
Once out, unclip the connector (careful the wire doesn't slip back into the depths or you will need to take the splash guard off!)
I like the look of them, but wait and see what the MOT says - they are orange so should be legal (and all have now passed without comment).
I fitted mine so the light strip moves forward (ie the first to light is closer to the door). Easy to check - lock the car and then press the lock button again so all the lights flash quickly.
Changing the Spotlights - info: Mary Parker; photo: Sami Sundelin
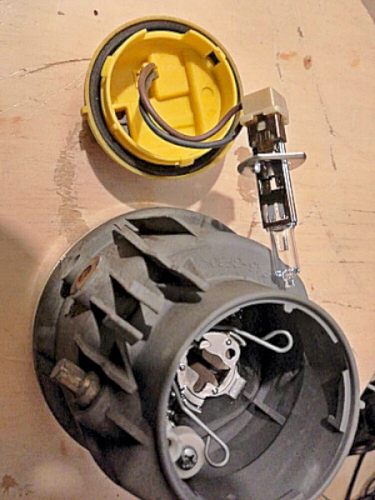
- First jack up the car so you can look up from underneath the spotlight.
- Pop open the flap under the bumper.
- You need a 10mm socket with a 6inch extension bar to undo the nut and push the light forwards through the bumper. Unclip cable.
- Twist protective cover quarter turn anti clockwise and then you can replace the bulb.
- Bulb is a standard type H1 - 55watts
- Refit the spotlight.
- Takes about 5 min - or £13.50 to buy new after market spotlight.
Rear Lights
One or two reversing lights have failed - if not the bulb then this has been traced to the switch on the gearbox.
If headlights come on at same time as Brake Lights. Check the stop/tail light is the correct one. Fitting a single filament bulb can jumper across the two circuits and cause endless confusion. It does happen!

The rear light assemblies are removed via access panels inside the boot. Two special nuts hold the assembly in place. If tight, the nuts can be started with the wheel nut spanner (really!) - try it!

Remove both nuts (don't drop them) and the whole of the rear light assembly can be slid out. Unplug the connector (release is on the side and quite stiff) and give it a light spray of Servisol contact cleaner/lubricant.
Check the gasket - should look like new - make certain it is replaced in the same position or water will get in.
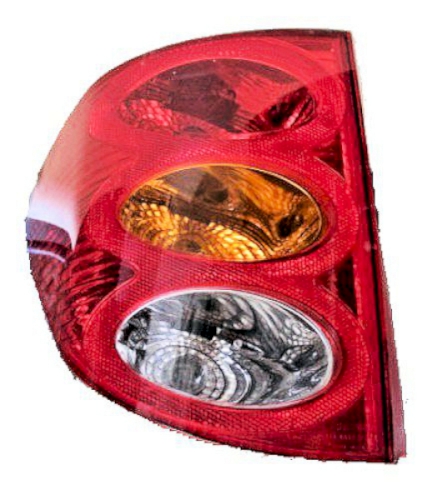
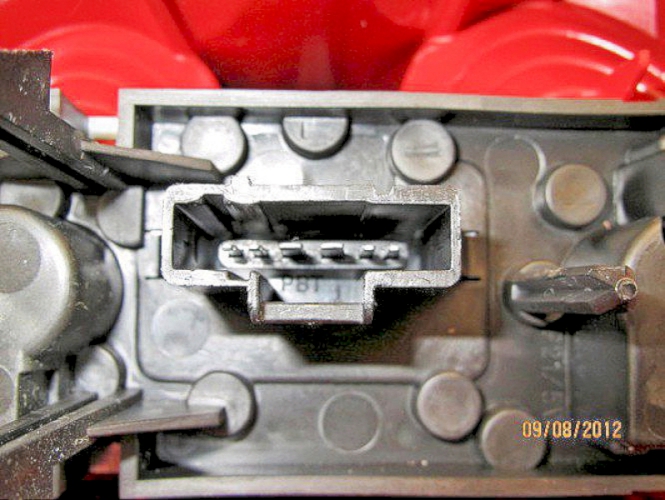
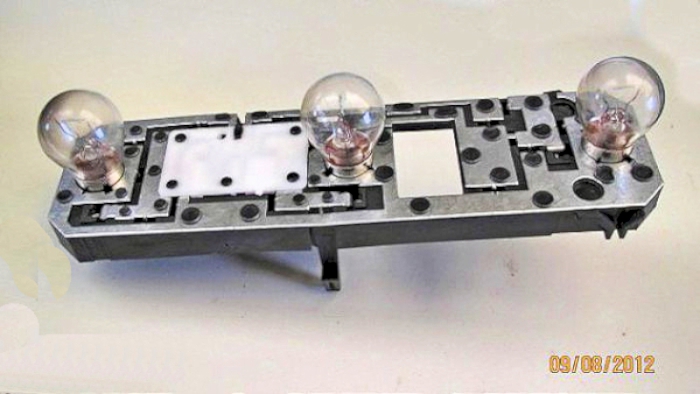
This is the nearside (left) rear light assembly off the car and with the bulbs removed.
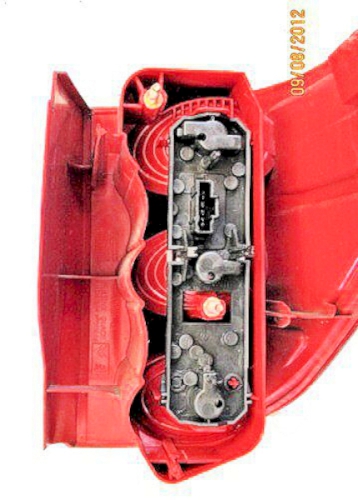
The 6-way connector socket is on the back. As the cars age, this plug/socket can give problems due to an overloaded earth pin. Mine were fine, but given a spray of Servisol in case.
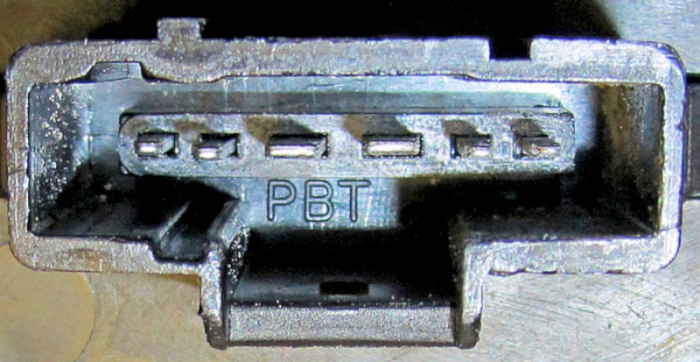
Note this is becoming more widely reported as the cars age.
Eight years on, a check showed that one rear sidelight dims very slightly when the flashers are on. The earth pin showed signs of corrosion. Cleaned up and contact OK again.
As at November 2020 Amazon has the plug available . I am not sure of the wire colours, but should be easy enough to splice in.
The three bulbs (other side is the same but with the rear fog light in place of the reversing light) are on a sub-board which simply clips into the back of the light structure.
Replaced the side/brake light 5/21 watt which was beginning to turn black and Servisol contact cleaner on all the contacts which looked as good as new.
NOTE: it is possible for the rear light assemblies to not quite click into the right place when being replaced. The displacement is quite small but can lead to a slight knocking noise from the tailgate. Please don't ask me how I know this.
Rear high level brake light
Is easy to remove after removing two nuts on the inside of the hatch and pushing it out. However some have had trouble removing them as the plastic has become very brittle and breaks easily after 12+ years exposed to the sun.