
Door Motor & Cables
If you are unfortunate enough to have one of the wire cables break, then you will probably have to replace the whole unit - this requires considerable dismantling, but it has been done. I don't know if new parts are still available, but the cheapest would be to buy a complete unit off a scrap car.
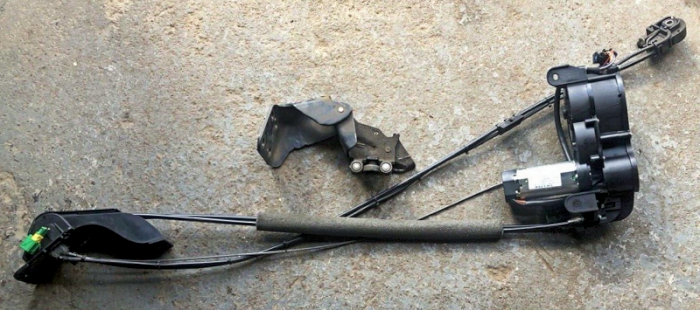
Andrew, Carsten and Michael have removed the door motor and cable assembly: their experiences are combined below:
Disconnect the battery - you don't want the motor coming alive whilst your fingers are in there!
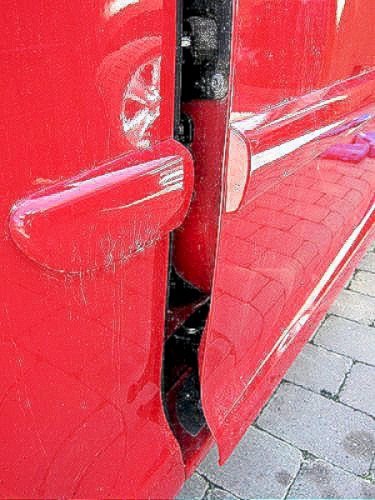
As the door cables had seized, it wasn't possible to slide the door open, so it was necessary to open it as far as possible to gain access to the nuts holding the bottom of the door to the travelling slider.

Remove the bottom hinge from the door (four nuts) and support the door fully open.
Remove the bottom rail and disconnect from the cable pulley, then remove that. The ends of the cable are a spring loaded "cup & ball" so a screwdriver blade popped them off the hinge.
Carsten managed to undo and move the seat right back to gain access without disconnecting the heavy seat cable.
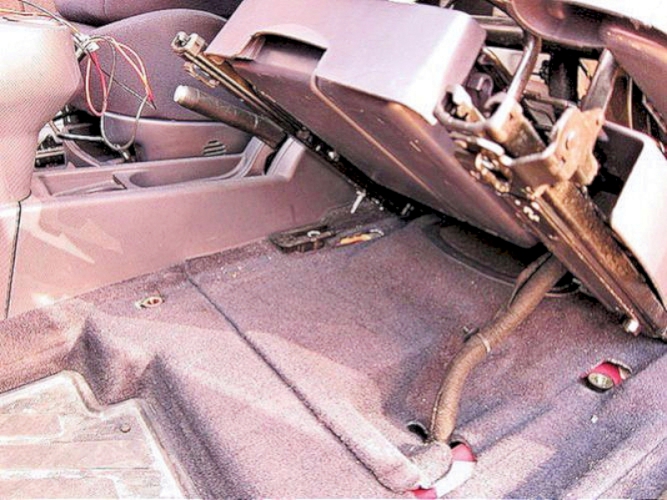
Andrew removed both front seats, centre console and floor pan cover. Due to the heavy cables without a plug and socket, he dangled one seat out of the other door and then placed the other seat into the vacated space. (note: there is a plug/socket in the seat; not immediately obvious)
or - to avoid keyhole surgery, Chris found that the seat can be removed completely (the plugs/sockets are up inside the seat).

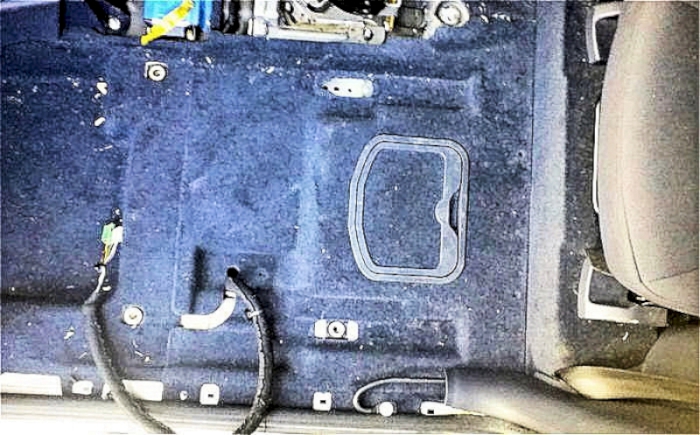
and the back portion of the floor can be taken off

and this is what is underneath the floor
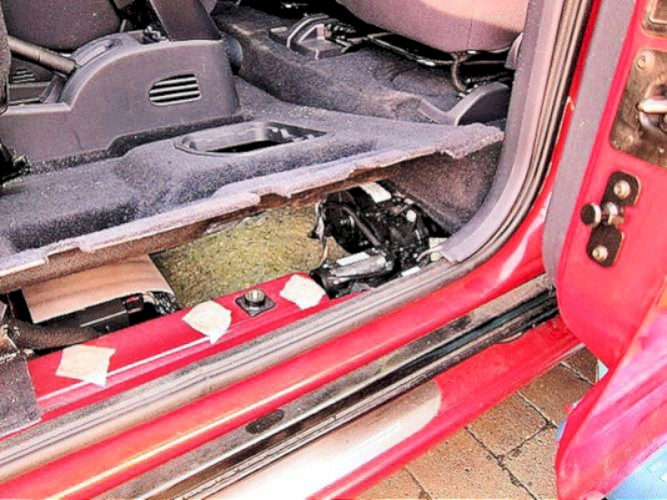
It took some while getting the Torx screws undone as they were very tight.
There is a triangle shaped pulley cover inside the sill with 3 nuts to remove - then the motor body has 4 nuts attaching it to the rear seat 'wall' - after this the whole assembly can be lifted away - feeding the cables through the large hole at the front end of the sill.
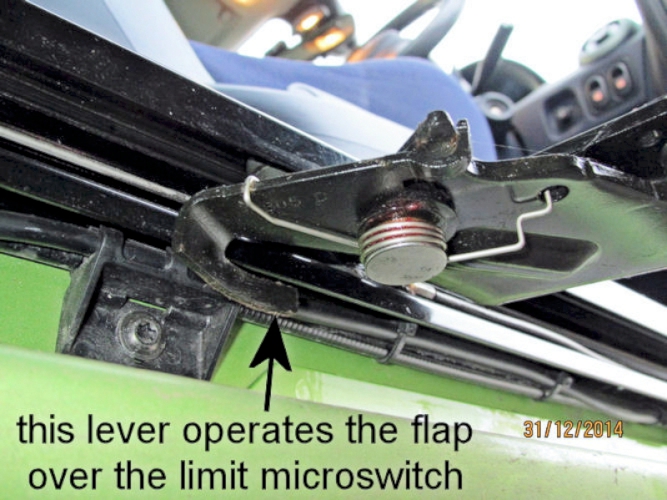
Michael Draper adds: The only thing that needs adding is to remove the bottom door guide as shown above and remove the one securing bolt at the far end of door runner guide holding the cable return.
Then remove the guide runner and cable support guides (all torx screws); the final nut holding the runner is underneath the passenger footwell and it holds the plastic cable guide that fits into the rear of the door sill.
Once all torx screws and the three nuts are removed you can pull the cable assembly into the car and remove the bottom door runner guide.
Fitting the new assembly is basically reversal of this procedure, but Michael found it easier to feed the cables through and secure back in place with the torx screws. Loosely bolt the cable return guide at the boot end of the door and then refit the bottom runner guide and secure.
The easiest way to connect the cables is to connect them to the bottom door runner guide prior to bolting it back on to the rear of the door with the four nuts as in the above photo.
Finally - reconnect the battery then manually reset the doors and they should open and close properly.
Hope this helps anyone struggling.
To fit the new motor assembly the 2 upright studs are flexible so that you can bend them forward to allow the motor body to seat itself.
Andrew had difficulty stretching the 2nd cable far enough to fix it to the hinge, but later found that by closing the door with a separate 12v battery to within a foot or so, he was able to pull the cable sufficiently to do it easily.
After a cable seizure, Xiaochun managed to reassemble the cables and get the door working again. The problem here is that there is significant tension with a spring between the two black rollers.
To get over this, loosen the end of the door runner first. Then fit the drum assembly back in the car. After loosening the end of door runner, the cable is free to move. This gives enough cable to connect the ball ends onto the door but the door runner position will be about 4cm too short.
Finally, force the end of door runner back to the correct position using levers on the appropriate parts. Xiaochun used a screw driver flat head to point at the plastic slot and a metal bar to pull the metal hole for the screw in the middle of the end of door runner to push back end of door runner to its fitting position.
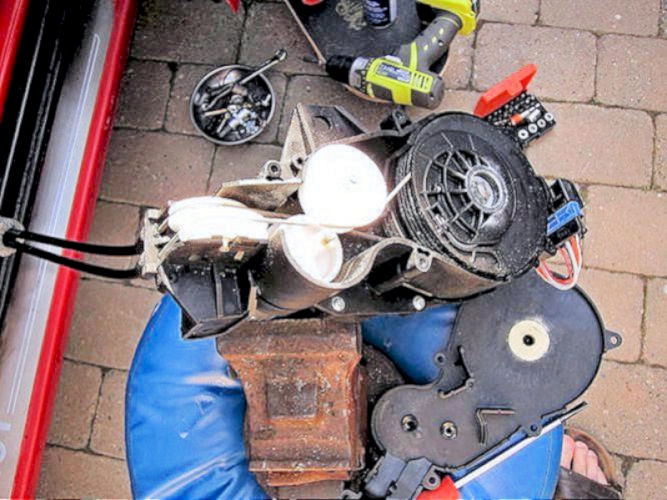
Having got the assembly out, Carsten found out why the motor had failed:
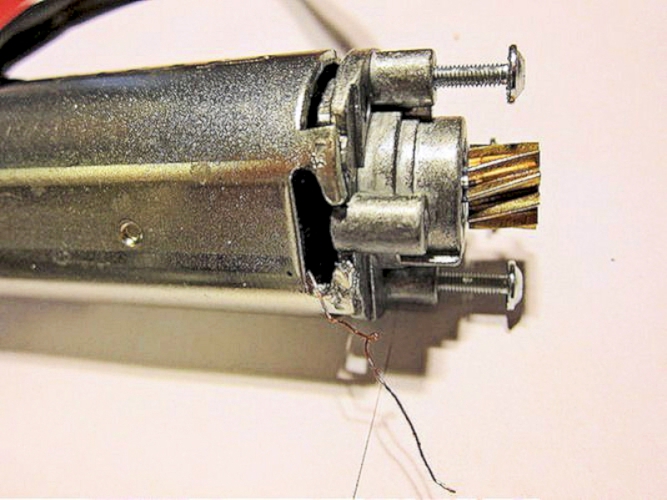
Carsten removed the motor, and dismantled it. This is the drive end; don't like the look of that wire hanging out.

Looking towards the brush end, through the permanent magnets; all looks well.

However with the armature out and on the bench it was a very different picture.
As there is no sign of burning, it would appear to be a mechanical failure, possibly due to over-revving when forcing the door closed.
Andrew's mechanism then jammed up again and Carsten hasn't replaced his (so has manual door operation) so the following is a guess as to what should happen next:
Once all is refitted and tightened up - ensure the door will move (against the resistance of the cables and motor) to the fully open and fully closed positions. Check the cables have remained taut throughout the movements.