Brake Light Switch
For the 2-Tronic auto box - if the brake lights are not working the car will not start - the brake light switch is here:

Note that the drawing is for LHD cars; switch is in same position on RHD cars - up under the passenger side glovebox, with a strong metal cover to protect it.
The switch is also part of the Cruise Control circuit
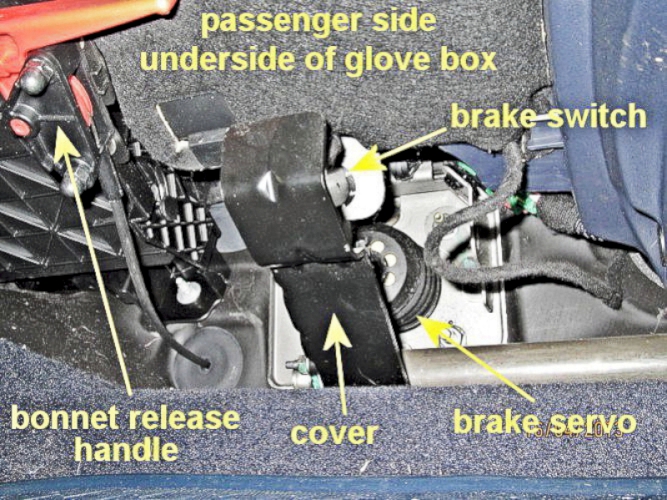
position is shown when looking upwards from the passenger floor
The brake switch operates the opposite way to the way you might expect.
When installed it is set up with the brakes off and the switch adjusted so the end of the pushrod stays in contact with the brake lever. When you push on the brake, the first movement of the brake lever is AWAY from the switch, and the plunger follows. As the switch is opened up by the internal spring, one contact closes to light up the brake lights and also (only on the auto) to provide a circuit to the ECU to tell it to start the engine (as the brakes are on). This second contact on the switch also opens to disconnect the Cruise Control (when fitted).
Thus the switch can fail - either by the contacts failing themselves OR the spring getting tired/piston movement getting stiff. Hence a WD40 squirt might help in the short-term.
Removing:
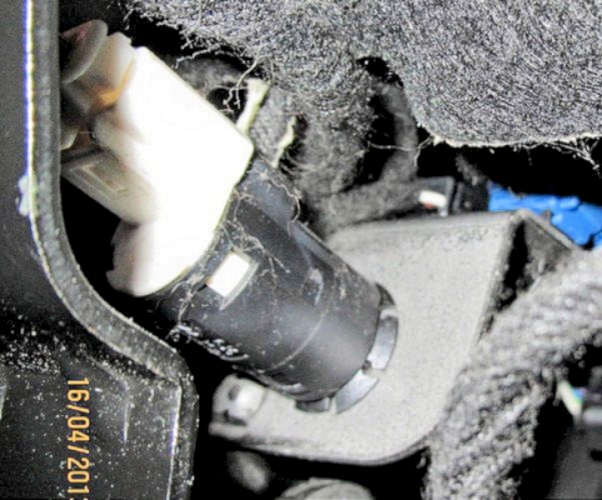
Access (RHD cars) can be achieved without removing the safety cover. Just remove the piece of trim under the glove locker (two fir tree clips). The safety cover is still in the way but it is fairly easy to get hold of the old switch; turn anti-clockwise to unclip and it simply drops out. Disconnect the connector.
Refitting:
Note that the piston in the push rod is self-adjusting on assembly and you should start with about 15mm (just over ½") of the fawn plunger extended beyond the black of the push rod. If compressed down to make it fit in the box as mine was, the plunger can be pulled out (clicks). Also ensure that the red or white locking key (it rotates as the switch is locked into position) is initially in line with the switch centring lug.
I found the best way to fit the new switch is to hold the brake pedal a little depressed (jam a length of wood between pedal and seat). Insert the connector into the new switch and the switch into the hole on the mounting. Turn the switch clockwise 90° to lock it in position. Then release the brake pedal and you should hear a click as the pedal comes up and automatically adjusts the length of the new switch.
Check operation of the brake lights; replace the under-dash trim and that's it.
Do be aware that fitting is a bit of a fiddle so you MAY just find that a mechanical adjustment is needed. With the brake pedal depressed a short way, it is possible to stretch the switch plunger in the gap - towards the bar that operates the switch (you should hear some clicks). Then release the brake pedal slowly and you should hear further clicks as the automatic adjustment takes place - easier to do than to explain! Check with fingers to feel the gap as the brake pedal is pressed and that pressing the brake pedal actually lights up the brake lights.
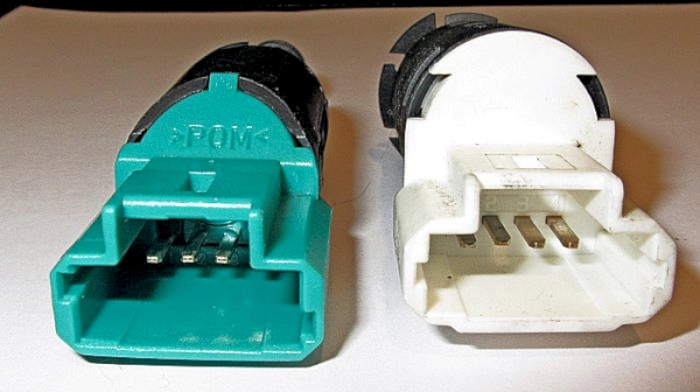
Note that there are two types of switch; the earlier VAN-bus type (white end) and the later CAN-bus type (green end) which comes with an extension lead with some components inside.

I spent some time trying to fit the later type which LOOKED the same, before I realised there were subtle shape differences (it was also a different diameter) so although it appeared to be a direct substitution - it wasn't. That meant that a five-minute job took me 30 minutes because I tried to fit the wrong switch.