COM2000 Unit & Cruise Control
The COM2000 unit is clamped just under the steering wheel on the steering column and includes the direction and wiper stalks
Early Cars with CAN/VAN protocol: Cruise Control was fitted to a few 1007's as an option.
On the early cars control was by buttons on the steering wheel; later cars by a stalk.
This option would have cost £200 back in 2006

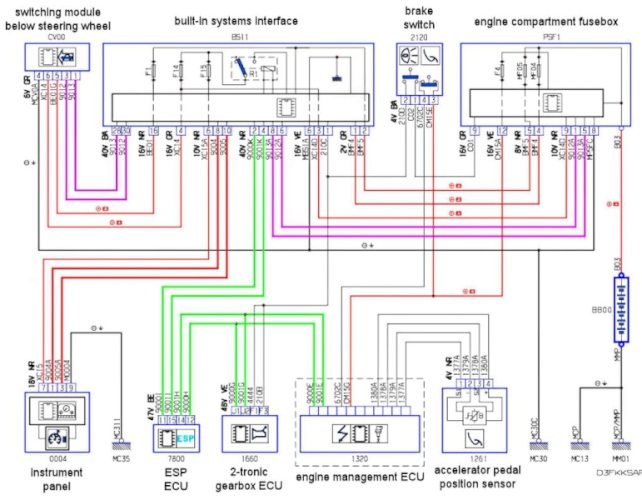
This is the drawing - I believe that all parts except the cruise control switch ("switching module", top left) should already be in place.
Note that there are several switches in the rather complex circuit: the brake light switch and the clutch pedal switch. Any can fail - and plug contacts in the blue plug/socket in the COM2000 unit have been known to go intermittent.
The switch in the steering wheel had failed in mine. A new switch and cable assembly from a Citroen C3 - item number 4112HG - was sourced and fitted (£174 cost though).
With the car stationary and the engine ticking over I hear a satisfying "bong" when I operate the sliding switch telling me the cruise control is operative.
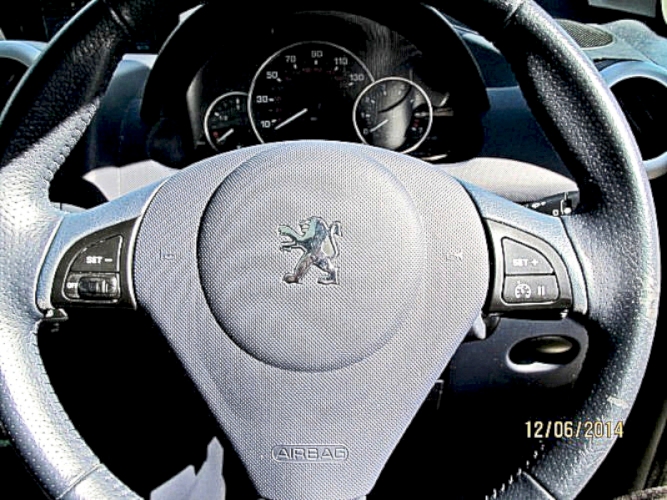
To access the cruise switch on the steering wheel, the steering wheel air bag has to come off:
First - disconnect the battery and leave for at least 5 minutes to ensure the airbag doesn't go off.
Remove the airbag by inserting two screwdrivers (not posidrives) through the holes at each side of the steering wheel and push hard inwards to release the spring catches. You can use a torch to look though the holes to see the vertical wires you have to push. Screwdrivers have pointed ends and tend to slip off the substantial round-section springs, so align the blade horizontally to push on the strong springs which run vertically up and down (or better, steel rods that neatly fit into the holes - remember they will need a firm push).
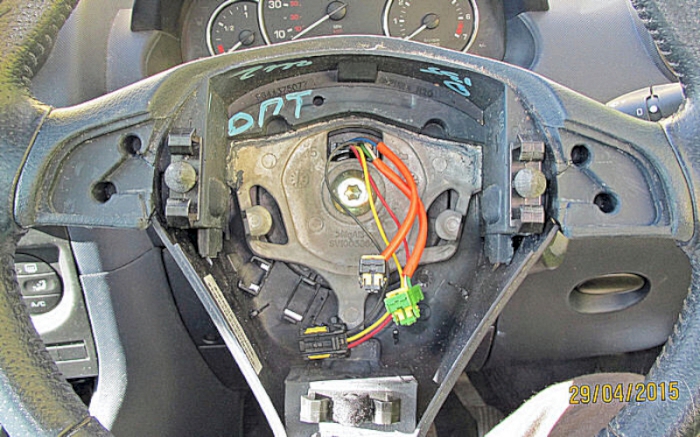
Careful of the wires behind as you gently pull the airbag towards you.
Unplug the green and black single wires which have different sized small Lucar type connectors. Remove the connectors on the airbag by lifting the yellow locking buttons and put the airbag in a safe place.

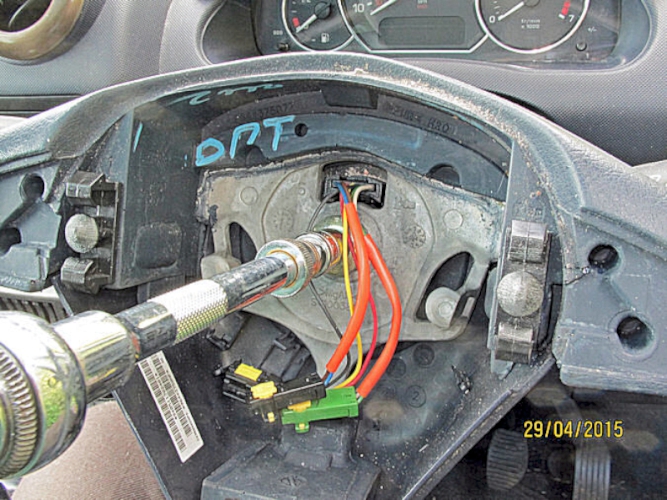
It is tempting to try to unplug here - but do NOT as it is part of the ribbon cable in the cassette that allows the steering wheel to rotate whilst maintaining contact for the horn and cruise controls.
With the airbag safely stowed out of the way, remove (gently pry off) the cruise controls from the steering wheel, unclip the wires and take to the workshop.
The switch housings are simply clipped together. Carefully open up the sliding switch housing and reveal the three simple switch contacts. Clean and re-tension the contacts and reassemble.
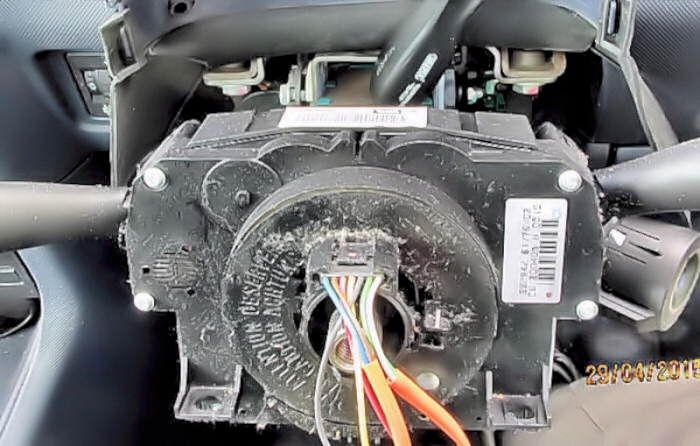
To proceed further and remove the COM2000 unit:
Partially undo the T47 steering wheel securing bolt. Before removing the bolt completely, pull the steering wheel up to loosen it. Mine came easily but not all may be so fortunate and there is always the danger that it will release suddenly and give you a swipe.

Mark the column and steering wheel to ensure the wheel goes back in the same position. Pull the steering wheel off the splines.
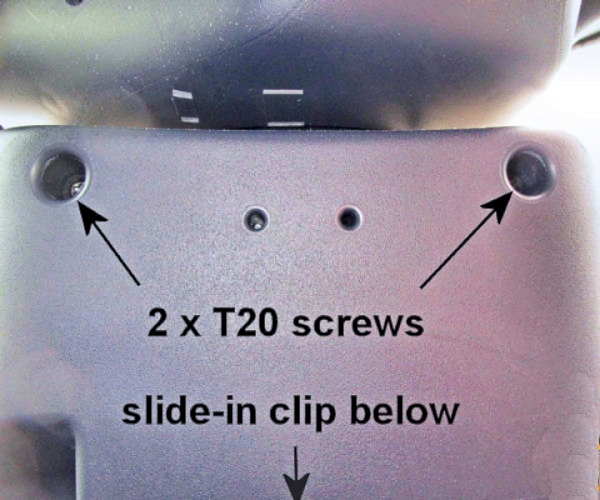
Remove the plastic cover under steering wheel:
A T20 screwdriver is needed to loosen the lower shroud which is held to the upper shroud by two screws; these are well recessed so the normal socket sets won't fit.
The two halves are clipped together and the top part simply lifts up on the rubber "hinge".
Remove the lower shroud, noting that the lower end is secured by a plastic tang over a metal bracket. It is a bit of a fiddle getting it past the ignition switch.
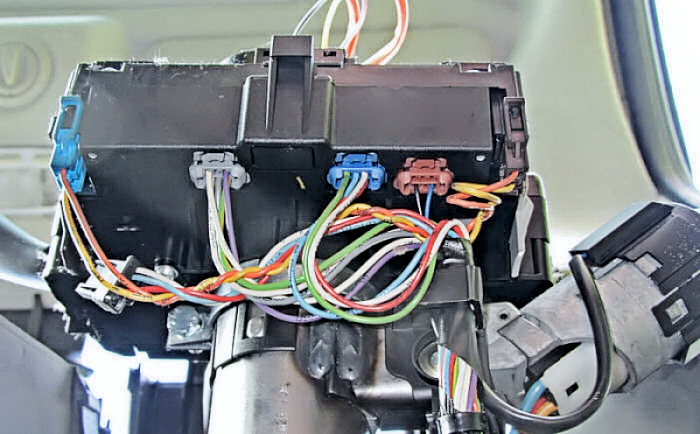
The COM2000 unit is the connecting box for the two column controls and the steering wheel controls. Viewed from underneath: from left to right
- the brown connector on the end: ? immobiliser pickup ?
- the brown connector: ? coded key receiver on ignition barrel ?
- the autos have a black connector: auto box wiring
- some have a blue connector: cruise control wires (if fitted).
- the grey connector: ? ?
- the blue connector on the end: ? multiplex system ?
very unsure of these - please confirm if you are able. I note that the wiper, headlight flasher and direction indicator switches aren't mentioned . . . . . .
Unclip the five connectors (the locking clip needs to be pulled outwards away from the side of the plug to release)
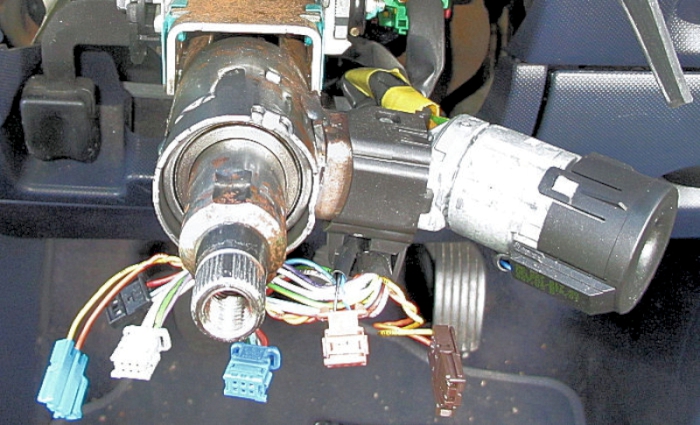
After slackening the clamp bolt and releasing the top and bottom clips, the COM2000 unit slides off easily.
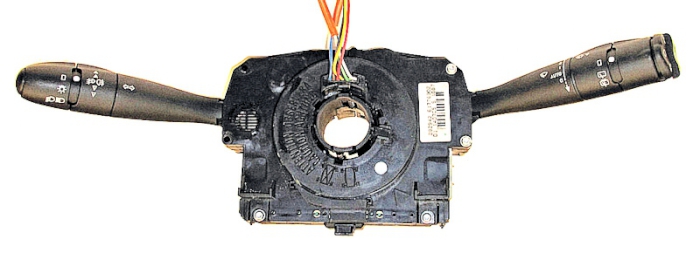
the manual version of the COM2000 unit off the car - identity number 96576794XT 6242N0 for early cars (VAN protocol) with cruise control (blue socket).

After removing the turn and wiper switch assemblies. Replace very carefully - as can be seen from the complexity of the motherboard. Note that the trafficator switch can wear to become "floppy" - a simple new part is available to cure this.
Also the three coloured plugs/sockets can go intermittent - unplug-spray-replug to cure.
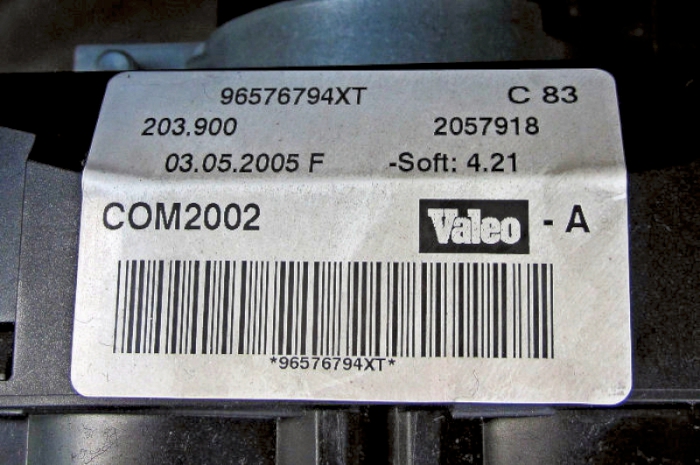
It appears to have the same number whether or not cruise control is fitted.

the automatic version (with paddles) of the COM2000 unit off the car - identity number 96576795XT 6242P3 for early cars (VAN protocol).
If you do take the COM2000 unit off, note that the COM2000 either works or doesn`t and there is no relearning or coding needed.
Reassembly is the reverse of dismantling as they say.
With the engine ticking over I hear a satisfying "bong" when I operate the sliding switch telling me the cruise control is operative.
Adding a cruise control stalk:
I have not done this myself - but have gathered some information below
I believe the stalk control may be retrofitted to some MANUAL CARS ONLY by finding the part 6242.Z9 and reprogramming the options using PP2000

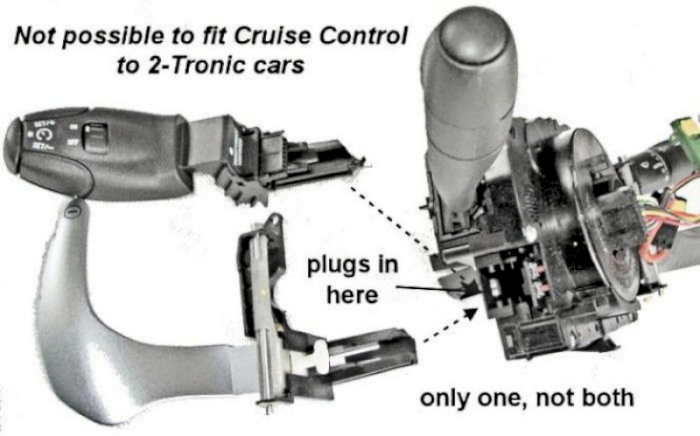
It cannot be retrofitted to early cars with the 2-Tronic floppy paddles; however it might be fitted to later cars which have smaller paddles.
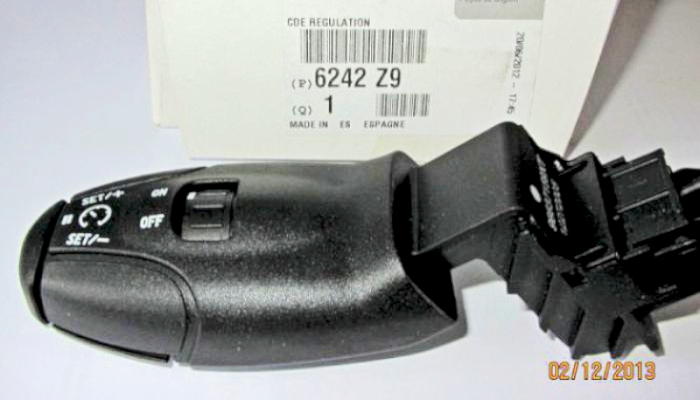
This is the column cruise control switch: Peugeout part no 6242.Z9
To install the cruise control switch:
Remove the plastic cover under steering wheel: two T20 screws and held in at the lower end by a plastic tang. The two halves are clipped together and the top part simply lifts up on the rubber "hinge".
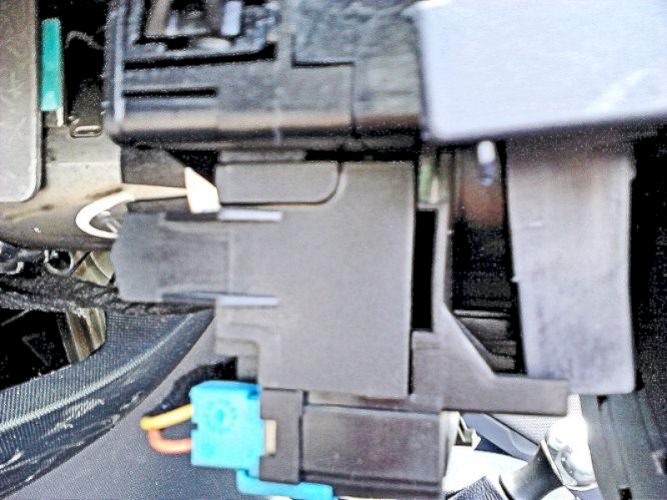
Once this has been removed, there should be a plastic cover covering the port on the manual models: picture taken from passenger side of RHD car.
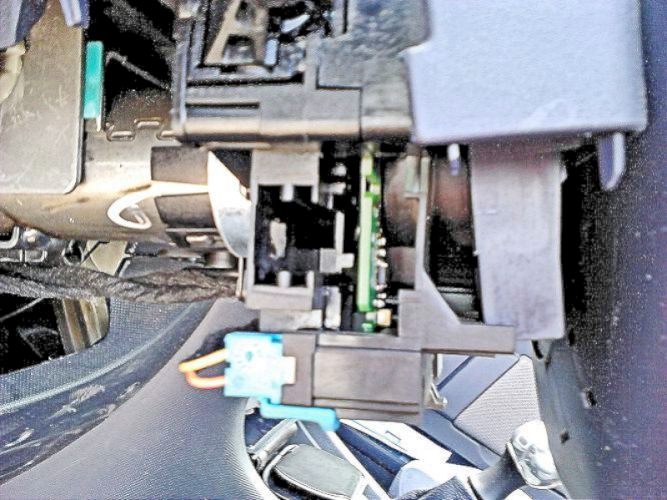
After removal of the plastic cover, this is how it looks: picture taken from passenger side of car (RHD)
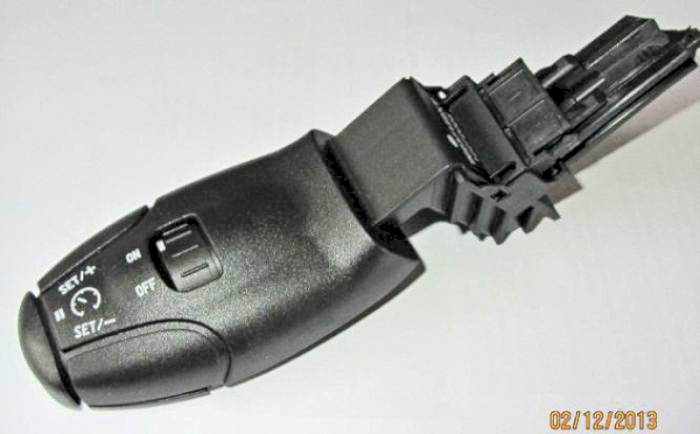
This is the stalk that goes into it. It should just plug in and be automatically held in place by a clip.
Activate it with PP2000 in 2 places (BSI and engine ECU) and test it.
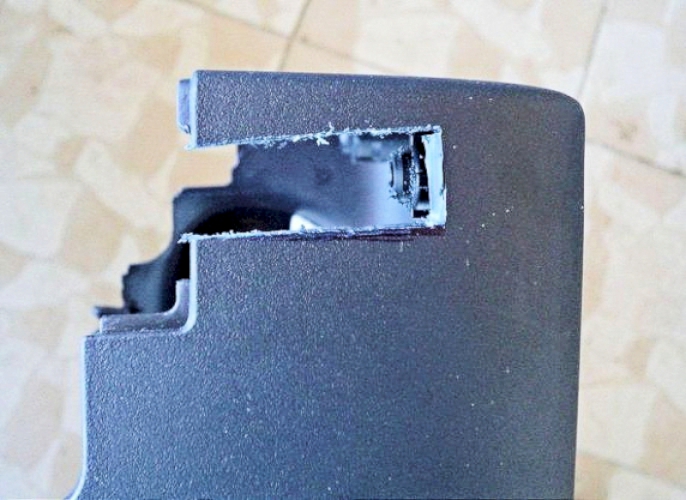
Once it is working correctly, you either buy the correct cover at Peugeot or just cut the hole yourself:

And this is the result:
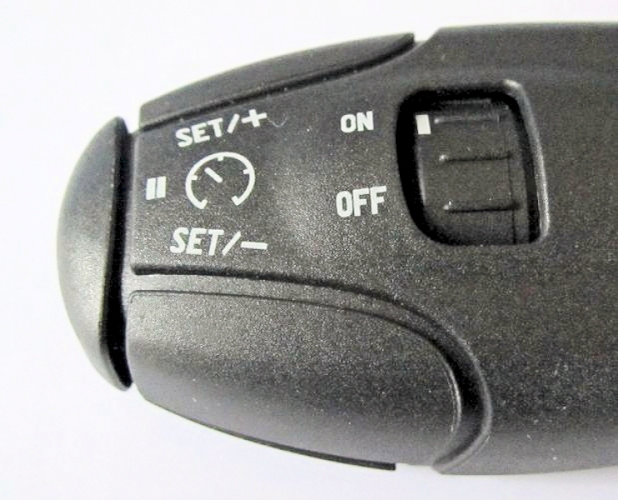
so now you can turn it on/off and set the speed (4th and 5th gear only)
also - see this (very long) thread : - page 40 onwards (after signing-in)