Changing the Thermostat
1.6 petrol
In addition to thermostat failure and temperature probe failure, be aware that one or two have had the plastic of the thermostat housing fail with resultant leak.
Don't attempt this unless you know what you are doing - this guide is intended for those who have "done it before"
A less than enthusiastic heater led me to suspect the thermostat and sure enough, checking on the OBD port confirmed that the hoped-for 83°C was only a reluctant 69°C even in the very mild November 2011 temperatures. Measuring the temperatures of the actual air flow with a simple thermometer (fans full on) showed similar discrepancies.
| Air temp = 15°C (November 2011) |
OBD port water temp °C |
Foot outlet air temp °C |
Face outlet air temp °C |
Screen outlet air temp °C |
| original thermostat 1587cc | 69 | 48 | 50 | 54 |
| my wife's 1360cc | 83 | 67 | 73 | 64 |
| new thermostat 1587cc | 83 | 77 | 81 | 76 |
However when re-checked at an air temperature of +3°C in March 2013 the max temperature read by the OBD only reached 64°C - so is the new thermostat (just over a year old) or the temperature sensor suspect? My wife's car was still showing 84°C at the OBD so nothing to do with the ambient temperature.
| Air temp = 3°C (March 2013) |
OBD port water temp °C |
Foot outlet air temp °C |
Face outlet air temp °C |
Screen outlet air temp °C |
| "new" thermostat 1587cc | 64 | 72 | 66 | 68 |
| second new thermostat | 91 | 71 | 69 | 75 |
from which it would appear that the temperature sensor had failed and the thermostat was in fact OK. Sensor replaced and readings are now OK
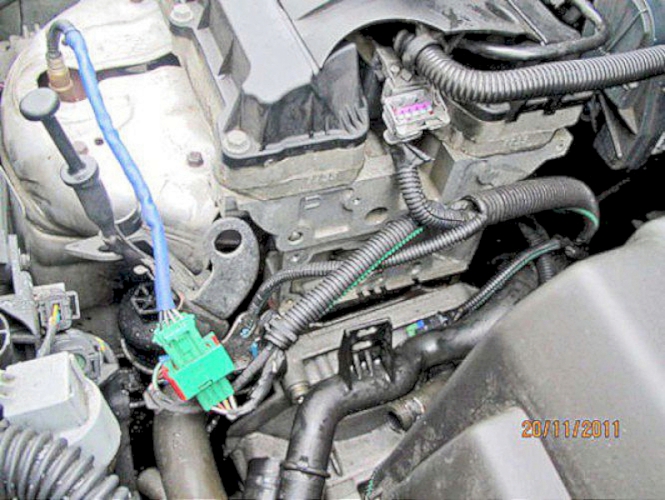
this shows the wiring for the sensor, fitted into the thermostat unit (screwed on early models; pushed in and held by a clip on later models). This sensor appears to send info to the Engine ECU; the OBD port and the warning light in the instrument panel.
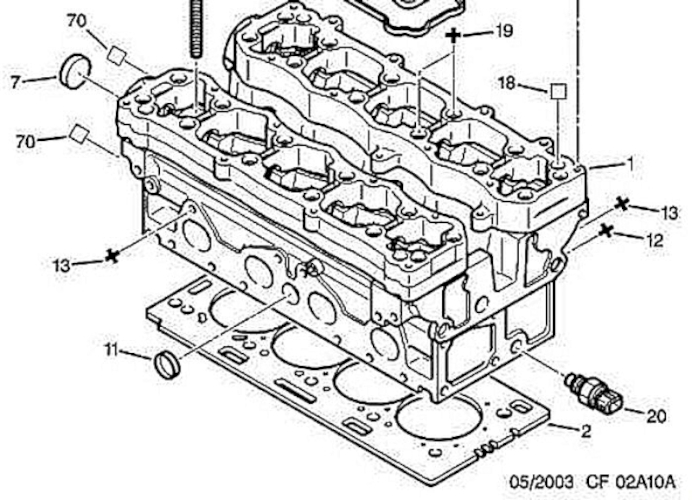
Note that a second sensor is shown in the cylinder head very close to the thermostat assembly, but I can't find any information on this sensor unless it is the switch that brings on the high-temperature light in the instrument panel.
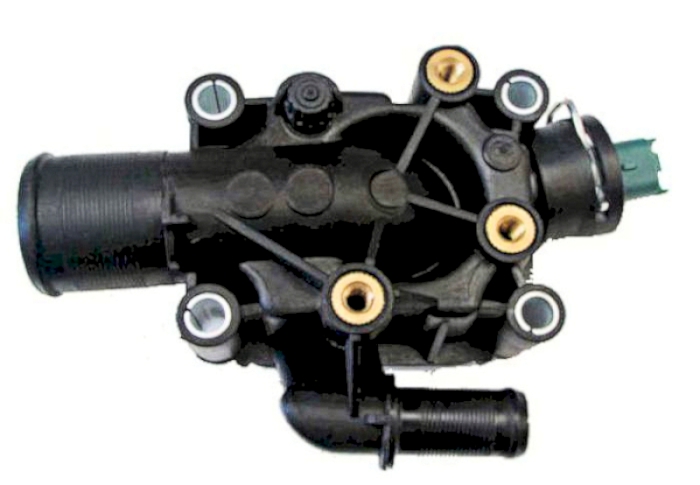
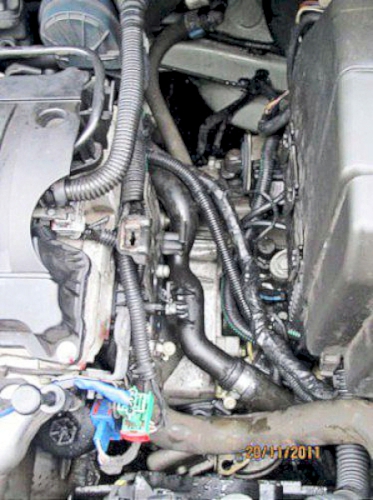
The thermostat itself is quite complex as it incorporates the water temperature sensor and two pipe stubs, as well as the thermostat itself all in one unit. Removing the thermostat is not straightforward as the coolant has to be drained and several water pipes disconnected.
Start by removing the air filter assembly and then its support bracket (2 bolts); also the bolt that holds the support for the adjacent water pipe.
The pipes are held by very strong clips - use a mole wrench to pinch the ends to slide them off and replace them by conventional jubilee clips on reassembly.
It can be helpful to disconnect the dip stick tube and the bracket and the connector to the coil pack to move the wiring around to get access to the thermostat - though not essential.
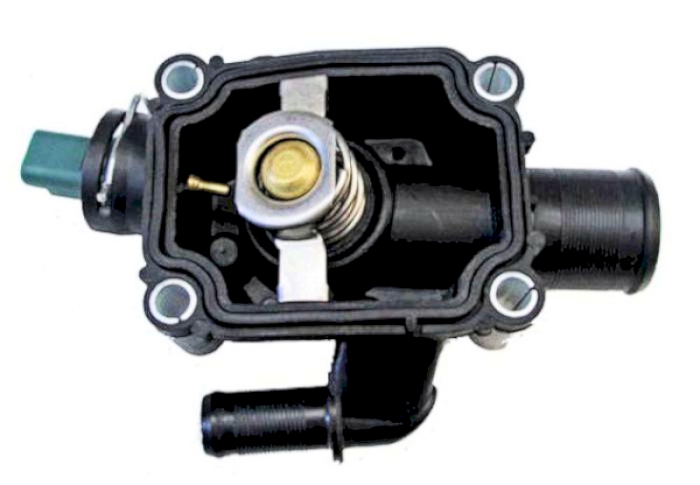
Remove the two rubber hoses (the heater hose is hidden so can only be disconnected after the thermostat is out), the temperature sensor connector and the four bolts holding the thermostat. I didn't drain the coolant first and instead let it run out as I pulled the thermostat out (afterwards washing the area down with clean water).
Reassembly is the reverse of dismantling, as they say.
Clean the mating surfaces of the thermostat housing - I didn't use any sealant.
Firstly slide the heater pipe and clip (don't tighten yet) onto the thermostat housing.
Carefully position the thermostat and its integral gasket and insert the four securing bolts; tighten down evenly.
Bolt on the air cleaner support bracket (two bolts) and the water pipe support bracket. Tighten the heater pipe clip and refit the larger hose to the thermostat; tighten the hose clip.
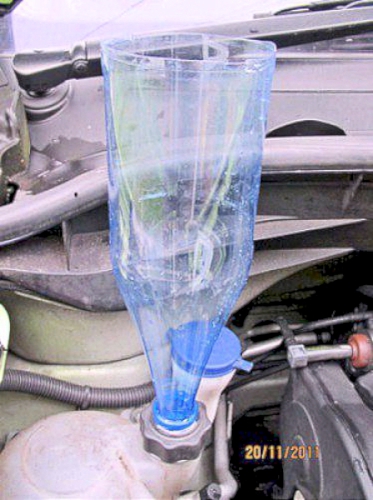
Refill the water reservoir - I used this device made up from an empty drinks bottle and old reservoir cap as you will need a head of water above the reservoir to fill the heater matrix.
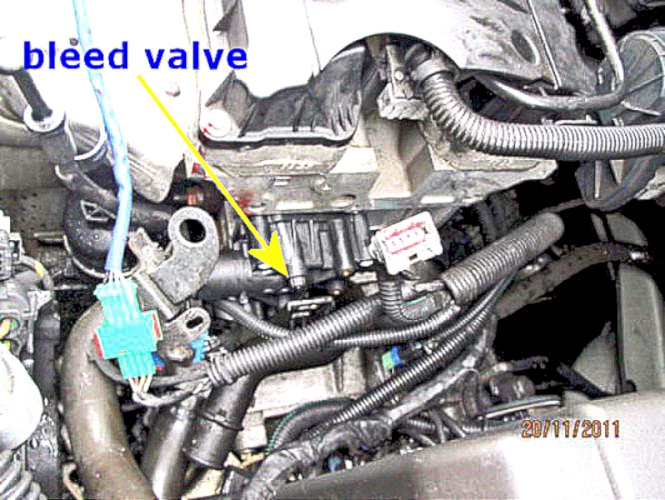
There are two small black plastic bleed caps - on one of the heater pipes near the bulkhead and on the thermostat itself.
Adjust the heater to supply maximum heat to ensure the heater valve is open, but keep the fan very low or the engine will never warm up!
Fill the reservoir, start the engine and remove the bleed caps one at a time. Close the caps when there are no more air bubbles coming out. Keep filling the filler until the reservoir is up to the full mark and allow the engine to run up to temperature; recheck the reservoir level and that there are no leaks.
Recheck level after a short run to warm the vehicle up - I found I had to top-up the reservoir again.
I also found after running the car that that the anti-freeze had mixed with the water in the reservoir so it wasn't necessary to add antifreeze to the reservoir to prevent freezing as it was part of the circulation system.