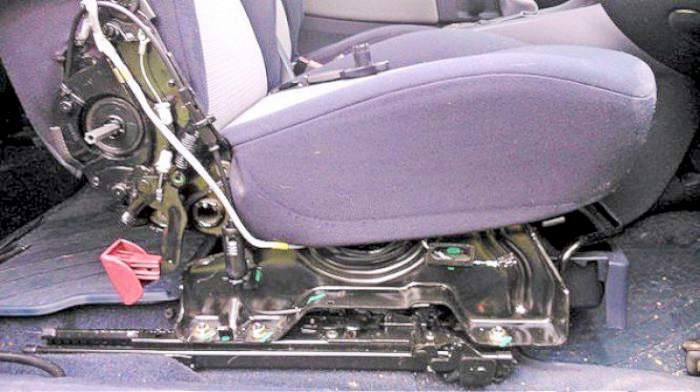
Front Seats & Airbag
DISCONNECT THE BATTERY BEFORE WORKING ON THE AIRBAGS!
You may find it easier to have the seat on the bench for some procedures
Removing the seat
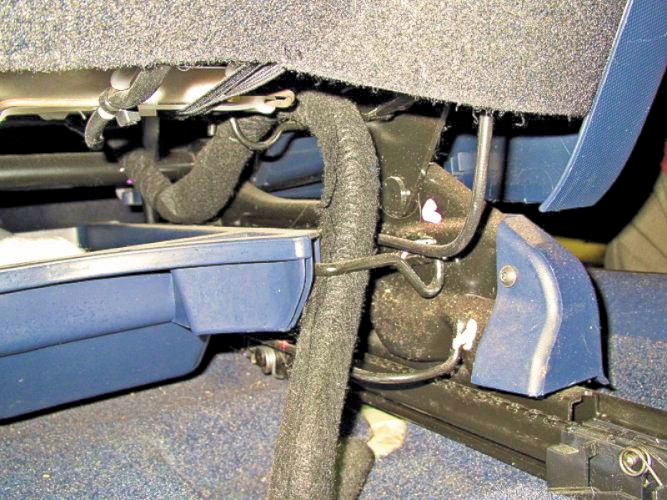
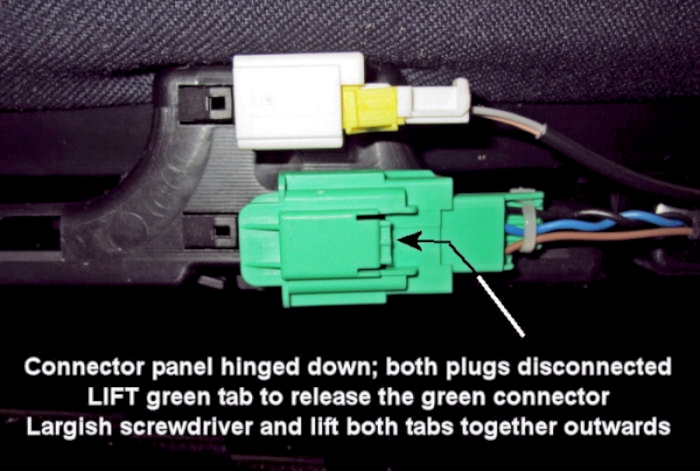
Under the FRONT of the seat, disconnect the two plugs/sockets for the airbag. Not obvious, but the connector panel is clipped in place and will hinge down to make access easier.
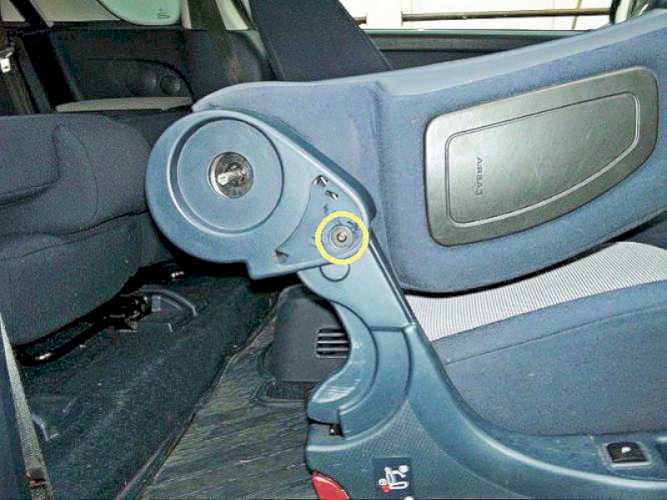
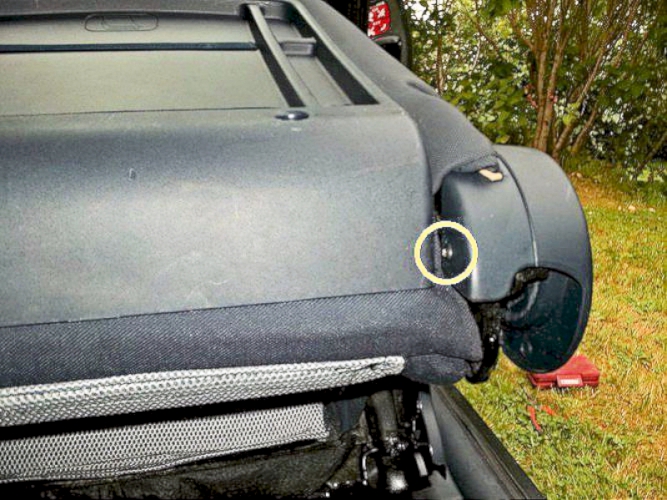
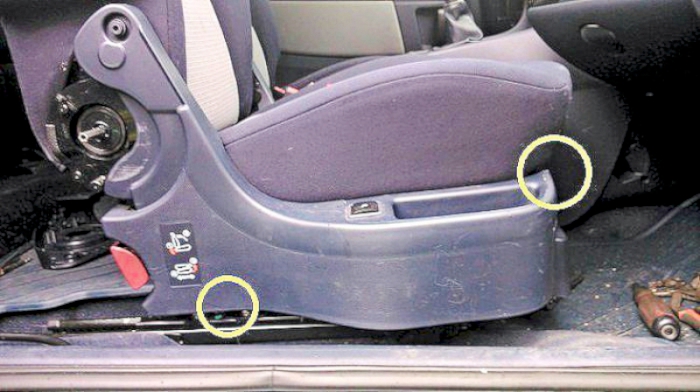
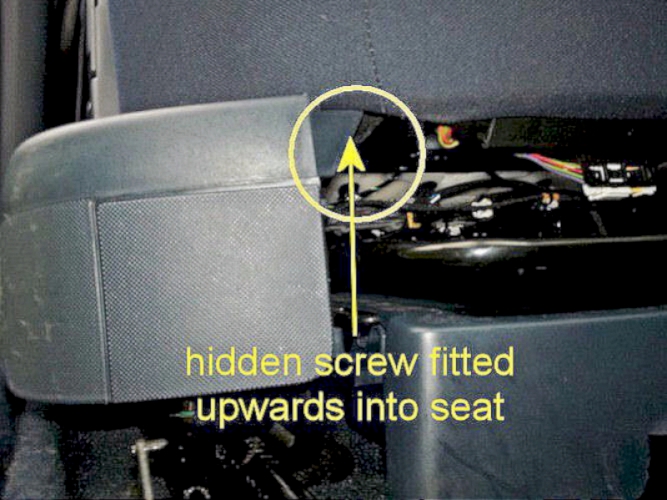
Then remove the seat by unscrewing the four torx screws and lift it out complete with sliders.
It may be a small car, but the seats are heavy. To lift I found it best to tip the back forward and lift holding the centre of the release bar at the front and the ledge at the top of the back.
If a front seat won't slide forward after seat back release operated
To release the seat for access to the rear of the 1007, there is a cable between the release handle and the seat sliding lock. This cable releases the seat lock so that the seat can slide forward on its runners.
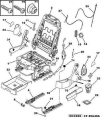
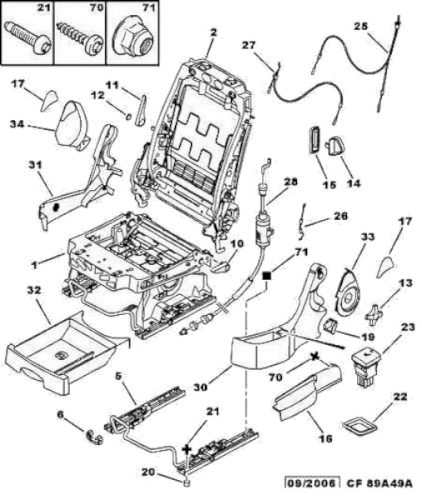
this drawing shows the passenger seat on a right-hand drive car, the parts will be similar for left-hand drive cars.
The link cable - item 28 in the drawing, part number 8918 H6 for passenger side; 8918 H5 for driver's side - is accessible after removing the plastic side trim from the seat.
note: pictures show the passenger seat on a left-hand drive car
there are variations between seats and the torx securing screws will be found in different places to those shown.

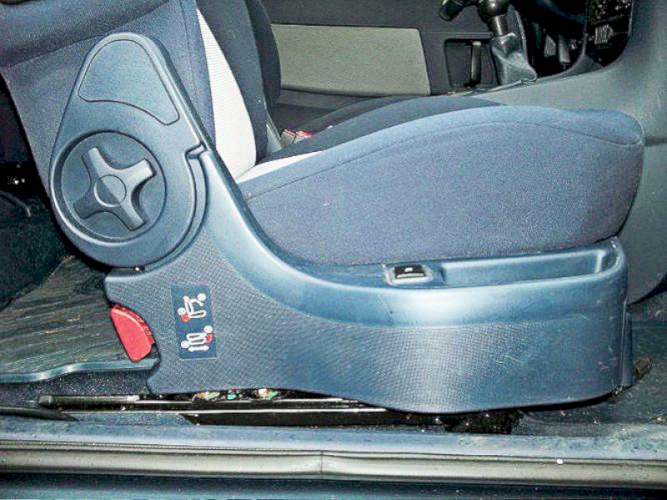
The plastic covers at the side of the seat have to be removed so the seat looks like this.

Remove the seat back adjusting knob - it clicks into place so carefully prise it off
note that most won't have the black switch which is for heated seats on a few models

with the cover off, it looks like this and the rather expensive (£80-ish) cable can be replaced or the airbag wiring (see below) repaired
Actually cheaper than a new cable, I bought a complete seat from a scrap car with half the mileage. I had a spare new seat cushion anyway and of course the Cameleo covers switched over on to the new seat.
"Airbag Fault" showing on multi-function screen
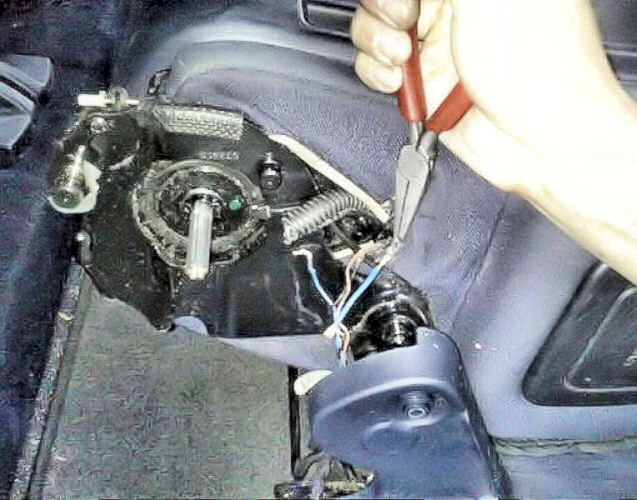
This warning has often been found to be one or more of the 3 airbag wires broken at the hinge of the passenger seat.
DISCONNECT THE BATTERY BEFORE WORKING ON THE AIRBAG WIRING

Note: the pictures show the passenger seat on a left-hand-drive car
Remove the plastic cover at the side of the seat (see pictures above) and extend the wires to avoid recurrence.
French Youtube video here
If the airbag light is "on", the airbag circuit can be tested by temporarily bridging a 3.3ohm resistor across the airbag terminals on the green plug (see below). If the airbag light goes out then the circuit is OK and the airbag itself will need replacing.

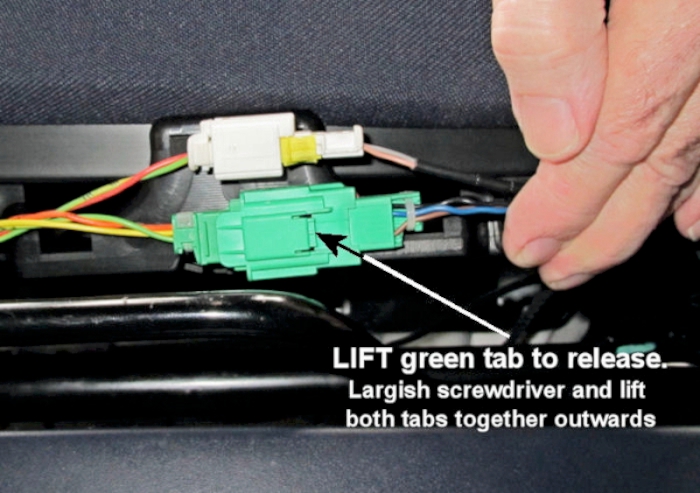
The connectors are accessed by hingeing down the small plastic panel holding the connectors. Pull quite hard at both ends to unclip - it will click back into position afterwards.

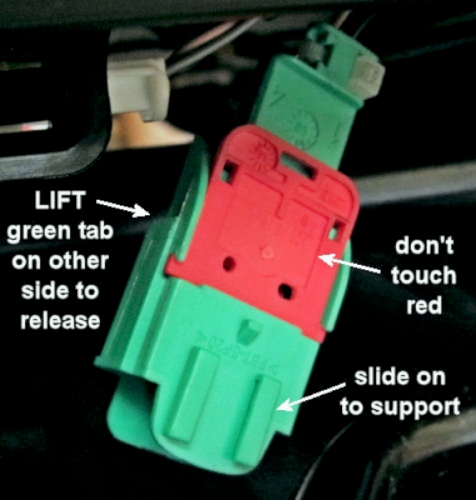
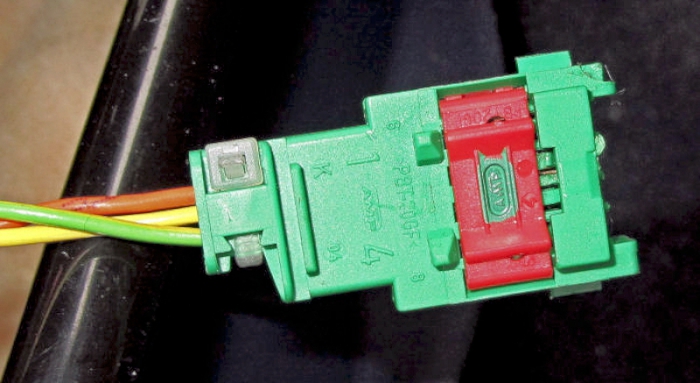
The white connector for the seat belt comes apart easily; the green connector for the airbag not so easily:
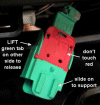
Don't try pulling the red clip, or you will destroy it; simply don't touch that red clip. It's a type of connector that you'll understand how it works once it's separated.
Removing the seat back - info from Yves De Muyter
Remove the 2 torx screws from the bottom of the back and push the panel down about 1 to 2 cm.
The trick is that there is a big plastic clamp at the left and right of the panel, about half-way down. You'll have to go with your fingers between the panel and the seat-cushion and push both clamps inwards at the same time. They won't break easily but if you pull the panel without pushing the clamps they will certainly break since they are relatively firm.
