Sliding Roof
The sliding roof is a rare extra on the 1007 in the UK.
This extra cost £550 back in 2006
Mine worked perfectly except for a small up and down movement at the nearside rear corner which caused a slight rattle and lifted slightly at speed
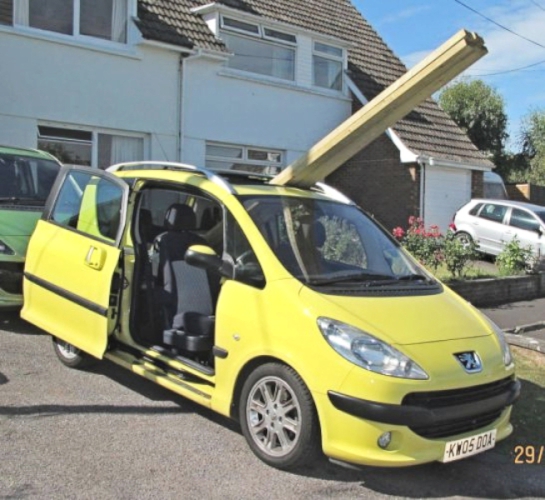
The sunroof is useful for letting in the sun; for letting out the heat - and for long loads.
When he saw the little 1007, the man in the wood yard expected me to ask for delivery of the substantial 3.6 metre lengths of wood for my new workbench. He was surprised that the 1007 took it so easily!
The sunroof assembly is a single unit bolted to the roof.
It is possible to remove (after removing the interior trim) as a complete unit. This might become necessary should the seal between the unit and the roof pressing fail and let water in.
see here to remove the complete roof assembly
Sunroof initialisation
- Turn sunroof opening control to closed position
- Press sunroof opening control. After 3 seconds, the sunroof moves to the locked torque closed position and opens again by a few millimetres to the normal closed position.
- Release the sunroof opening control in under 5 seconds - the sunroof is then initialised.
- Apply a short press (under 2 seconds) to the sunroof opening control and release it.
- Again, press the sunroof opening control in under 5 seconds and maintain pressure. After 4 seconds the roof opens partially and then closes. Release the pressure when the sunroof is closed.
- The sunroof becomes operational (Sunroof initialised: Learning process completed: Auto-programing operational)
Sliding roof components
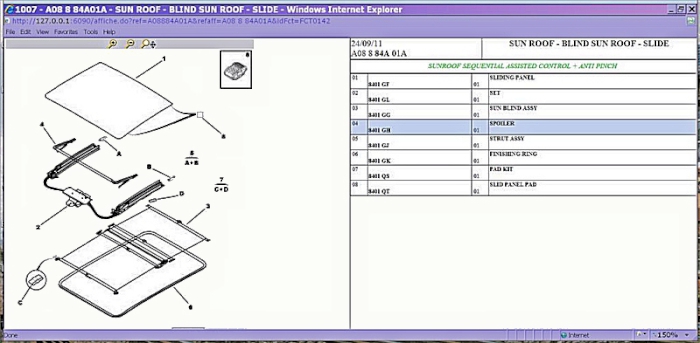
These are the parts comprising the sunroof - also see below for part numbers of sliders
to remove the sliding part of the roof

looking up from inside, you can see the seal in the roof aperture - but little else!
so I shall have to remove the sliding part of the roof to see exactly what holds it in position
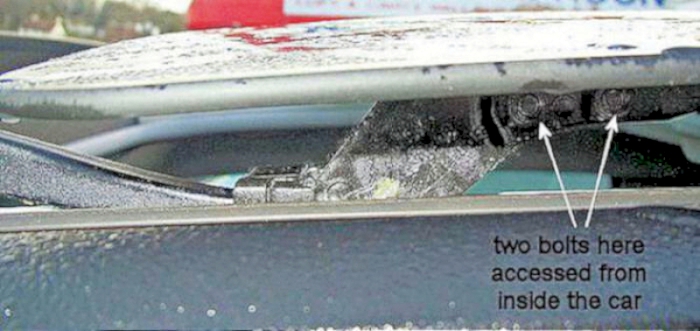
The sliding roof section is held by two T20 Torx bolts each side at the front - accessible from inside the car with the roof half open

and by a single T30 Torx head bolt each side at the back - these seem VERY tight (Loctited or similar in place)
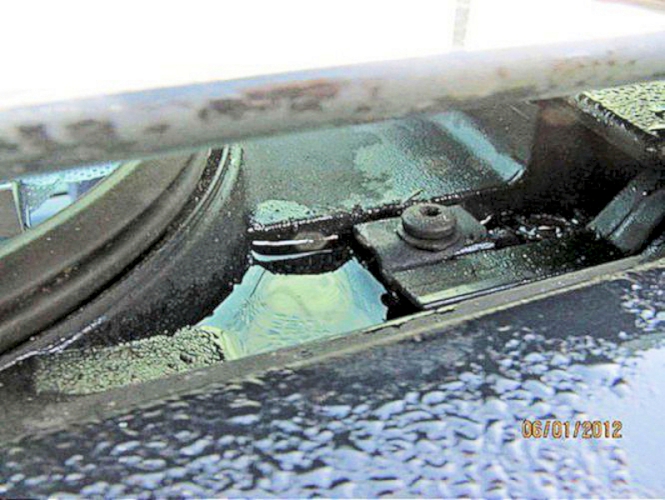
Ideally the rear of the mechanism drops down this slide and remains in the down position to seal on the rubber surround in the roof opening. However on the nearside it is able to lift a little, which means it doesn't make a 100% seal and can cause an annoying rattle.
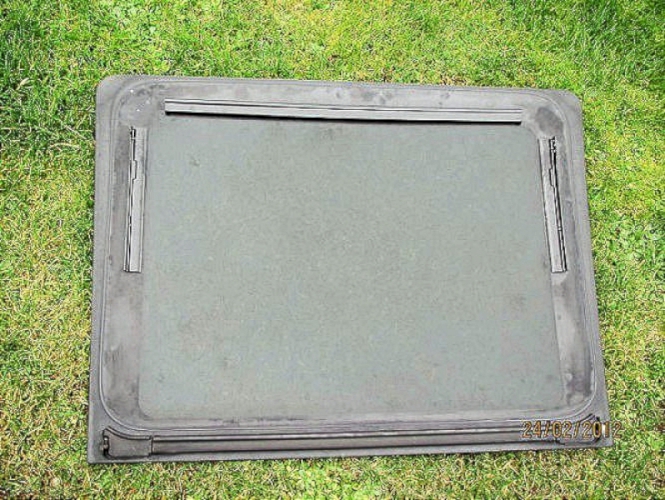
The moving section of the roof came off easily after removing the 6 bolts - they had been held in place by Loctite or similar.

The second picture shows the sliding mechanism which is driven by the motor via flexible cables.
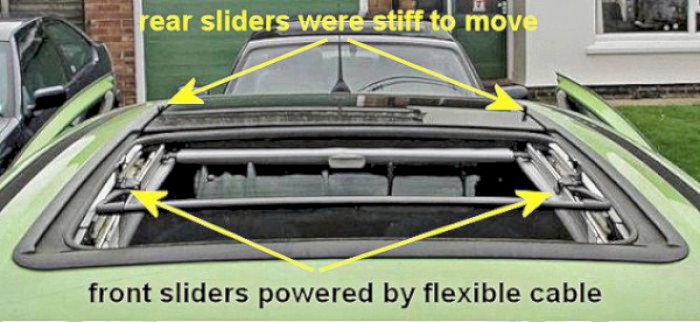
With the roof off the car, it could be seen how it worked. Towards the front, two guides are moved back and forwards by the motor via flexible cables. The rear supports are not powered, but slide in slots - these were very dry and moved stiffly until cleaned out and lightly greased with Castrol CL waterproof grease.

As the roof slides forward to the closed position, the guides pull the back of the roof down and hold it in position.
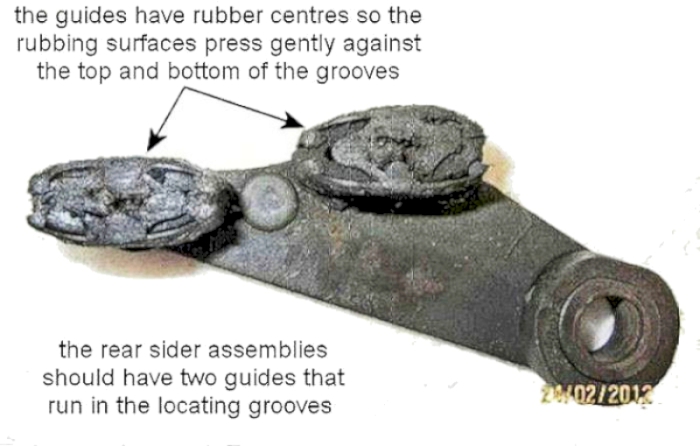
This is one of the rear guides, taken out of its groove. The two gungy-looking objects are free to swivel on their pivots and comprise outer plastic rubbing pieces, gently pressed outwards (to take up play in the groove) by rubber inserts.
The Peugeot part number for a 6-piece guide kit is 8401QT - they call it a SLIDE PANEL PAD
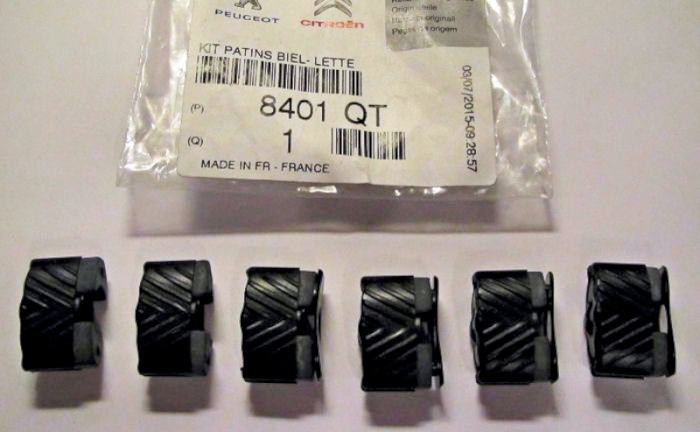
The guide kit 8401QT includes 4 sliders plus 2 more sliders to support the front of the roof.
The Peugeot part number for a 6-piece guide kit is 8401GJ - they call it a STRUT ASSEMBLY

The guide kit 8401GJ comes complete with the guide mounting brackets - these can rust over a long period.
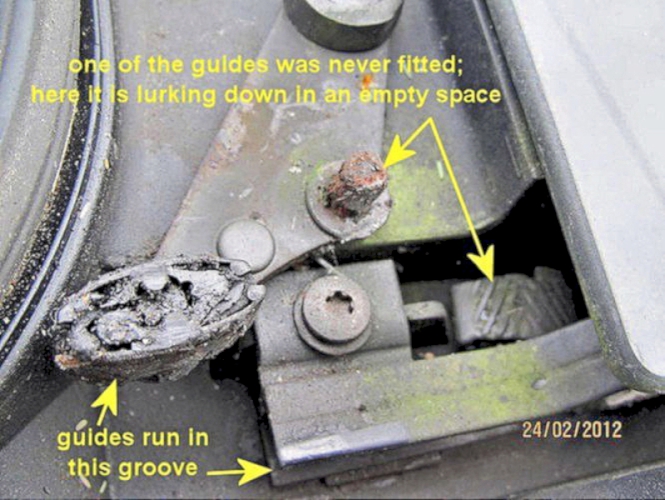
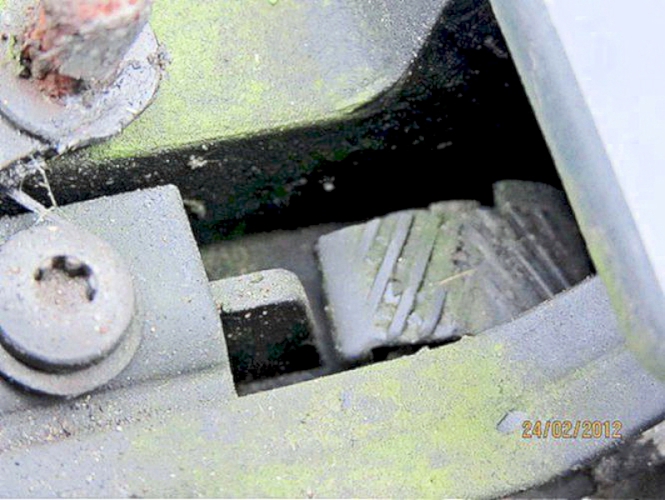
However, when the nearside guide was taken out of its groove, one of the guides was missing! - it is still there, lying in the adjacent channel
once fitted to the pivot, the guide assembly was pushed back into the groove again with some Castrol CL waterproof grease for lubrication.
then grease the flexible cables and re-fit the sliding roof - job done and rattle sorted.
Sunroof Drainage
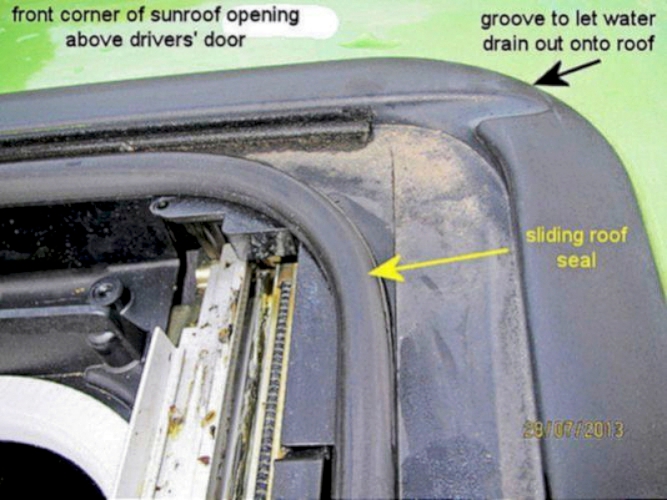
Normally, the sunroof unit is drained by these grooves at the front
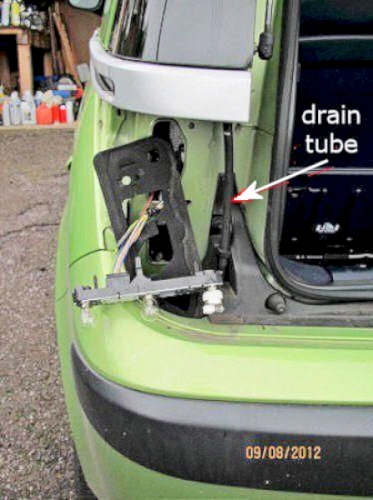
At the rear, conventional pipes lead the water down through the rear pillars to exit just behind the rear wheels.
Easy way to clear these tubes is to remove the rear light assemblies and pull the tubes up to expose the ends - there is enough slack to mouth-blow back up into the roof assembly.
Sunroof motor failed
Oh dear - left the sunroof open; downpour all afternoon. Car sodden inside but more importantly sunroof stuck in the OPEN position and unable to move.
Luckily had a groundsheet and with each side jammed in the doors and stones to weight it down made the car waterproof for the night.
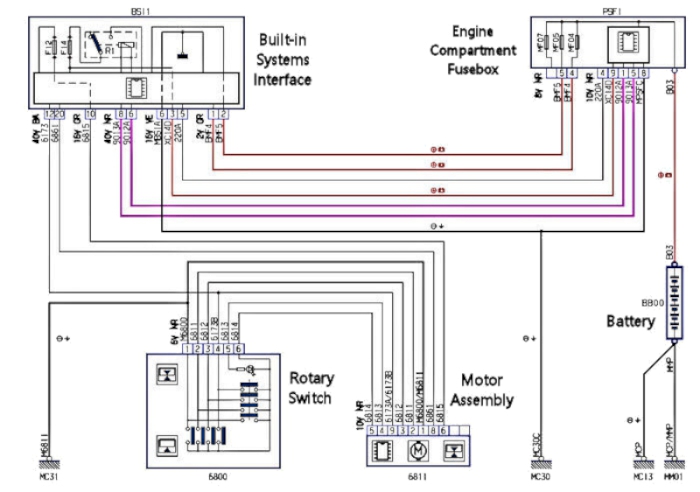
Wiring diagram is fairly straightforward, but note there is a PC board inside the motor assembly.
Check on fuse 12 in BSI - taking minimal current (enough to light LED in roof switch ONLY) so motor and/or electronics dead.

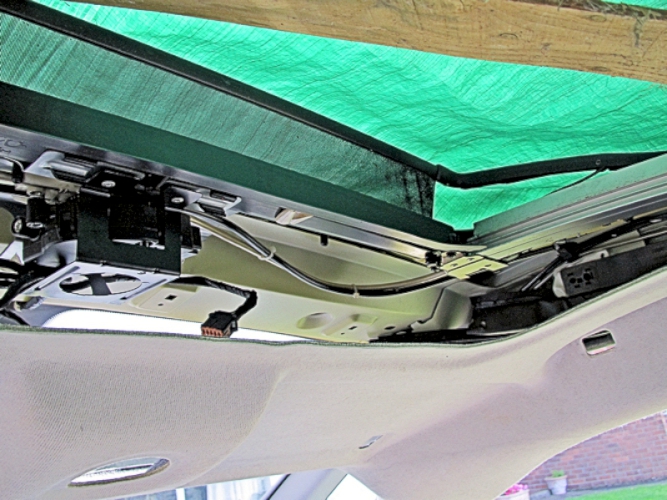
To get the motor out - firstly lower the front part of the roof lining
Pull out the front part of the lining finisher and let it hang down.
Pull out the rotary switch and the internal light assembly and unplug (be patient to find the releases!). Remove both hand grips (T30) and the sunvisors. The sunvisors have a push-clip - pull out the locks and pull BOTH at the same time or you can break one of the hinges.
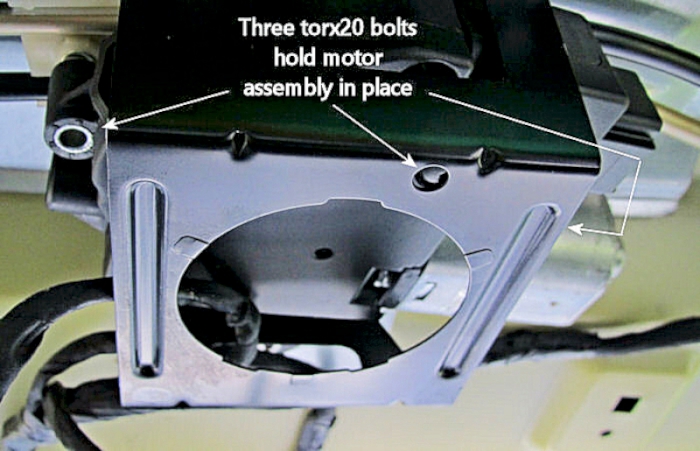
After lowering the roof lining, and unplugging the connector, the motor assembly can be removed by a T20 driver. One bolt already removed here; plus two others. Note that a screwdriver T20 with a narrow shank is needed to access the middle bolt through the hole in the mounting.
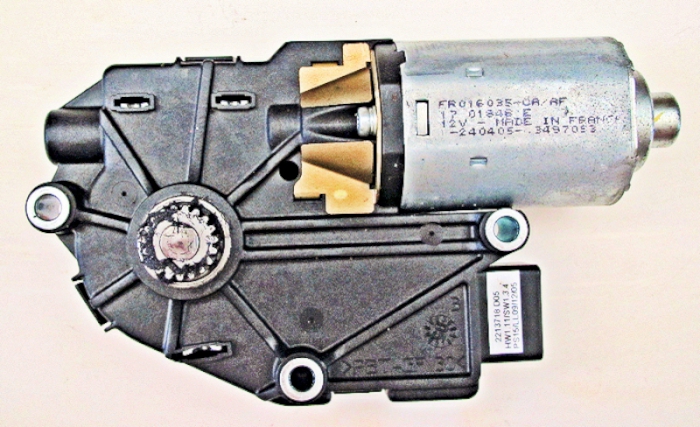
This is the motor assembly. Part number is 2213718 - also fitted to the Peugeot 407.
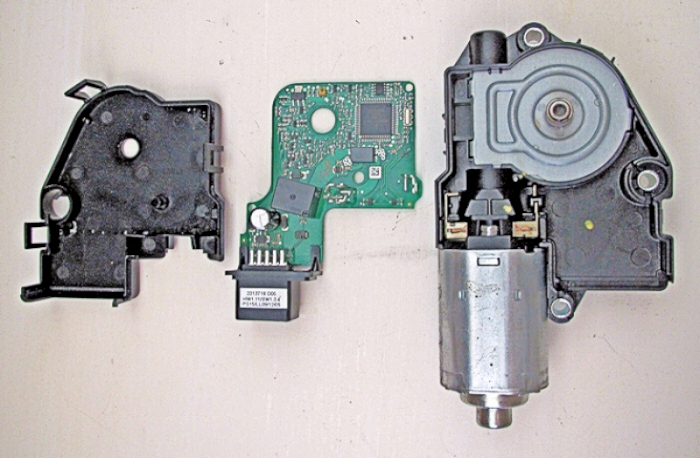
The motor assembly opened up. There was a very small amount of water inside which was dried out.
However the assembly was still dead when reinstalled.
Fitted second-hand motor unit off ebay; relatively cheap and plenty of Peugeot 407 ones available.
Fuse 12 currents with engine running: were (car on a slope):
approx 3.5amps to open and approx 6.5 amps to close
after lubricating rack driving roof and sliders:
approx 2.5amps to open and approx 4.5 amps to close
Inner lining and other parts reassembled and car returned to service.