Handbrake & Rear Brakes
Handbrake Cables
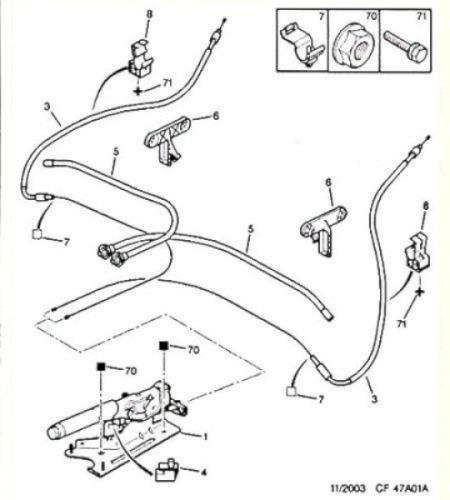
Changing them looks fairly straightforward if you can jack the car up. But might be less hassle for a Peugeot agent to replace as they will have a proper hoist. But see below for the drum braked versions which may not come apart that easily . . .
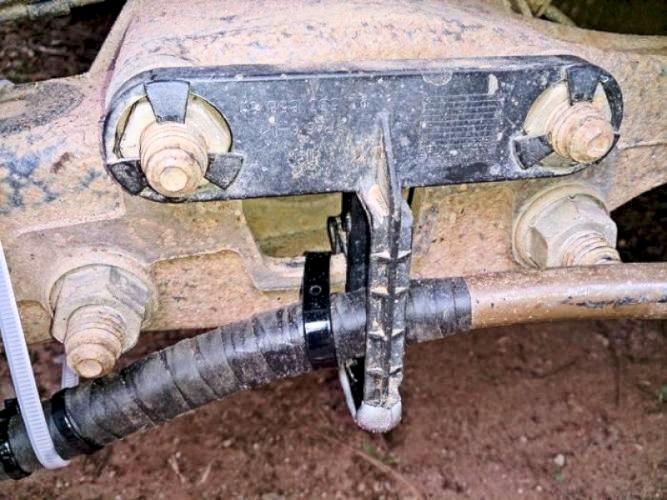
As our vehicles age some plastic parts may break. This bracket holds the handbrake cable but when it broke it allowed the cable to rub on the wheel. Luckily got it in time and repaired it but be sure to check yours.
Changing rear brake shoes - drum brake models only
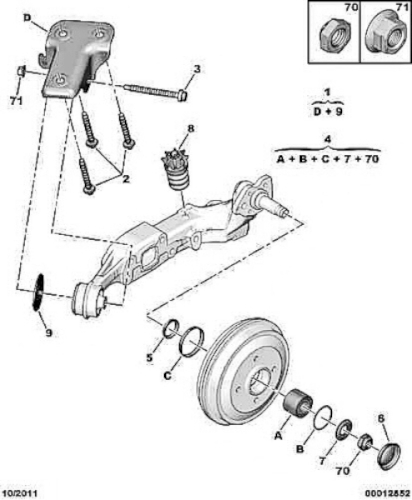
Drawing showing the trailing arm and axle parts
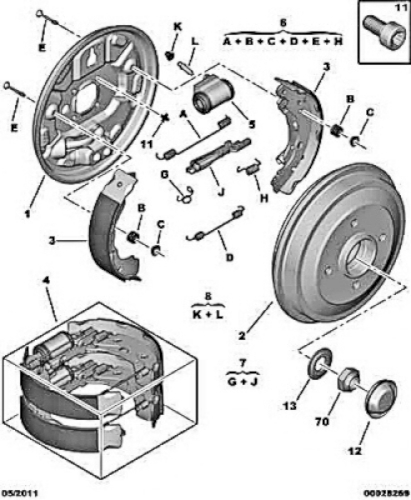
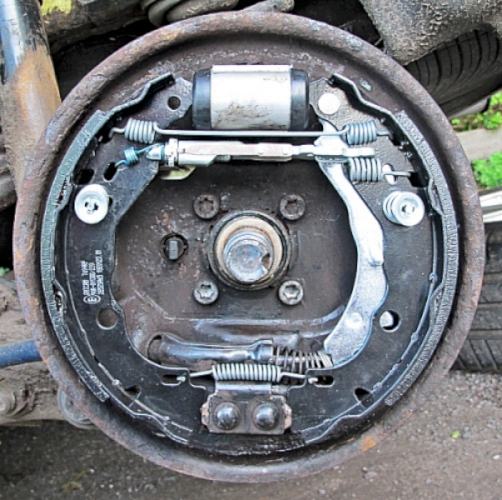
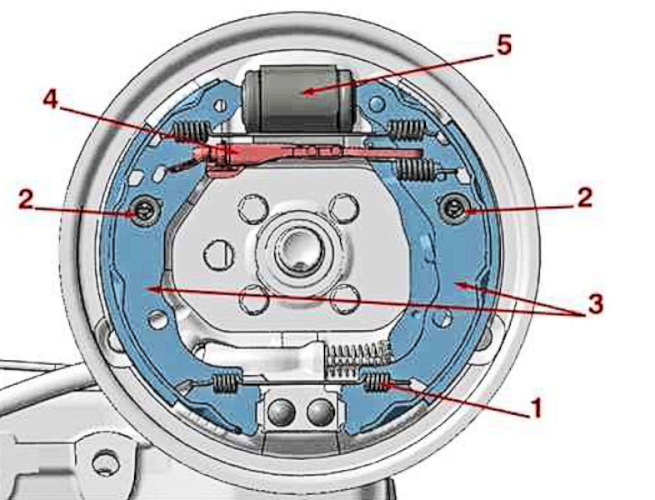
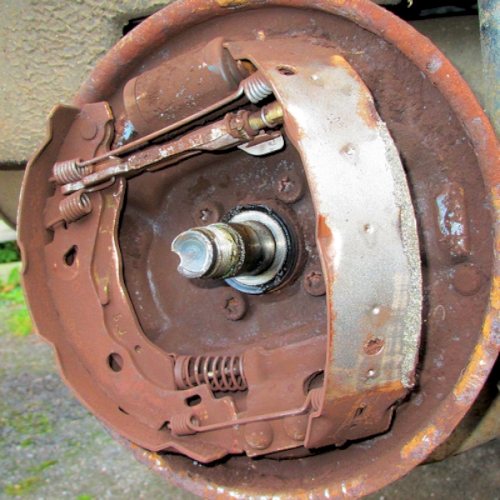
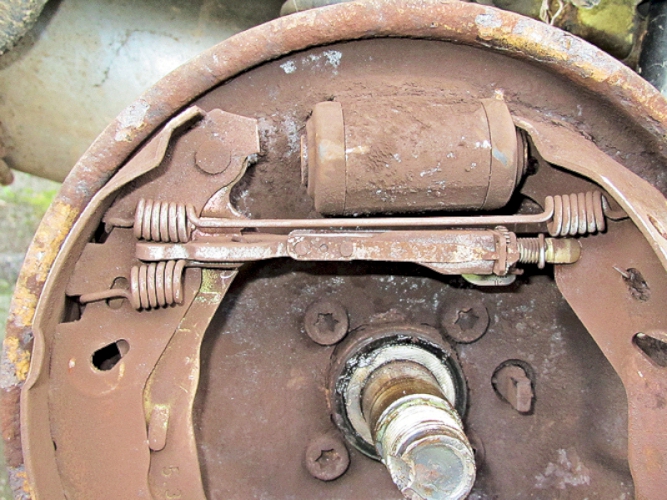
Drawing showing the rear drum brake assembly
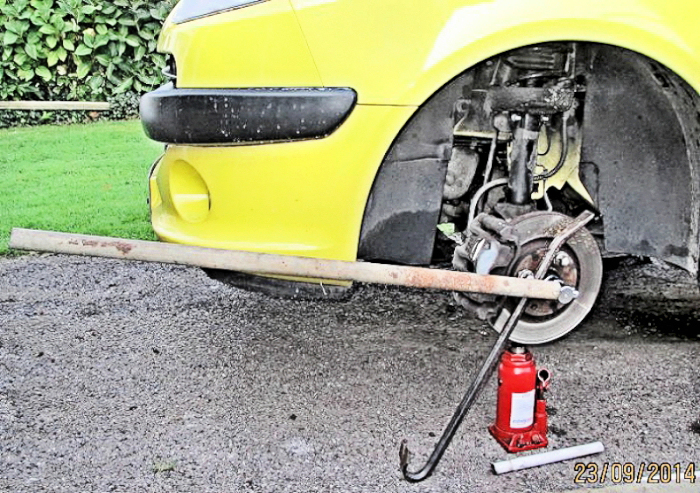
Remove: The rear wheel; the hub cap; the nut; the washer; pull off the drum
It can be difficult getting the drums off as the shoes are self-adjusting and it becomes increasingly difficult to pull the drum off over the small lip created by wear in the drum. Excessive force to remove the drum can pull the linings off the shoes!
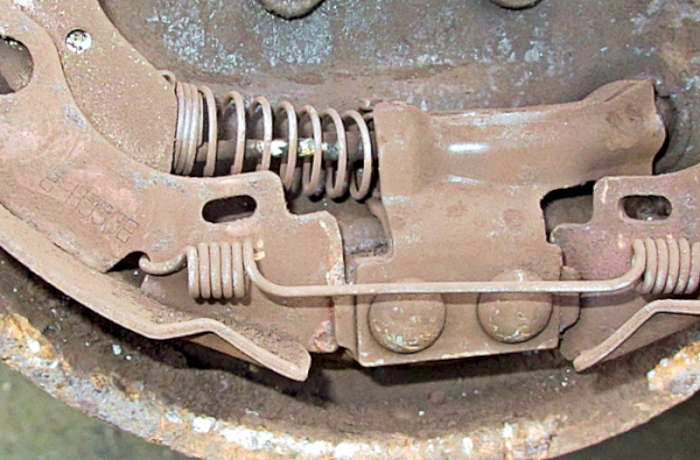
Very fiddly, but apparently it is possible to wind the self-adjuster back through the wheel bolt holes, but I was unable to do this. Be warned that the auto adjuster on Bosch drums has a piece of metal that stops the auto adjuster unscrewing (no info about the Lucas type). Ideally you need to lift this clear of the adjuster to allow it to be wound back; if not you risk breaking the adjuster.
You have to bend the metal up out of way just enough to allow the toothed wheel to spin back along threads allowing the sliding fork to come back under the tension of the long springs. Then just replace whole adjuster or carefully bend it back once the drum is off.

'A' shows where to apply smear of heatproof grease
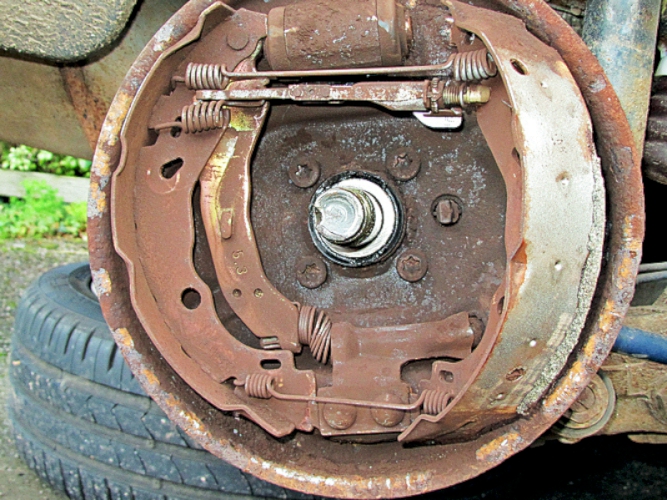
The good news is that even after 80,000 miles, it wasn't essential to replace the shoes but if you do - also replace the retaining springs, pins and clips.
Brake dust building up in drums shouldn't be a problem as it finds its own way out.
Replacing the rear wheel bearing (drum brakes)
Remove: The rear wheel; the hub cap; the nut; the washer; pull off the drum (see note about possible difficulty, above)
Use a press to remove the old bearing and replace with a new one (or buy new hub assemblies which already have the bearing in)
tap all around to remove the grease seal - thin metal so will bend. Have a new one ready.
(as for front bearing renewal) - had to stand on the bar to undo the nut - rear axle is the same. Rear axle nut torque - 30 m.daN - TIGHT!
use a punch to open up the securing dimple. Have a new one ready.
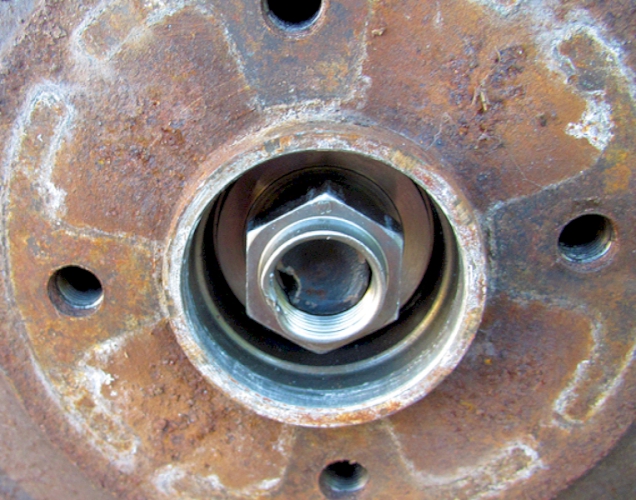
use a 32mm socket, undo and remove the nut - need a ¾" drive and extension bar (see above).

and then the washer (might stick, can be left for now)
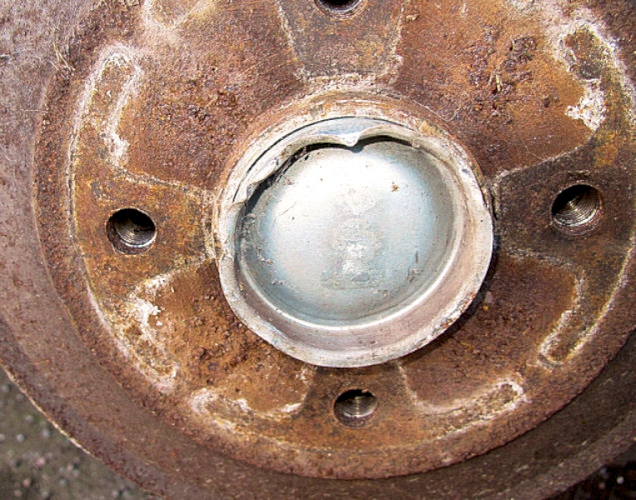
at this stage, the drum spun freely and appeared slightly loose. In theory should just pull off BUT - - -

no way would it pull off as the wear in the drum meant there was a significant lip. Although some say you can get at the adjuster through the wheel bolt holes, it didn't work for me - - -
- - - so I had to use brute force to pull the drum off.
this resulted in the pins holding the shoes against the backplate shearing off
and the linings eventually breaking off the shoes.
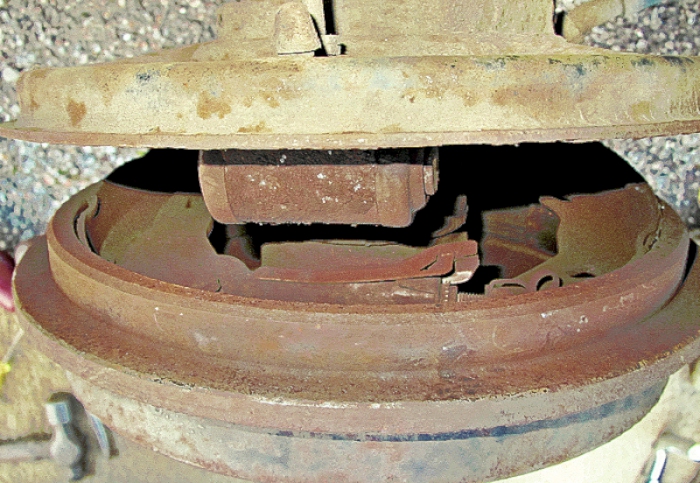
drum forced off eventually - linings and retaining pins/springs/collar broken off
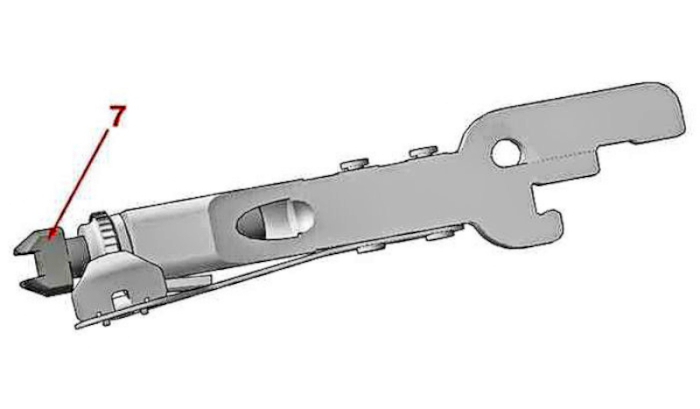
close-up of auto-adjuster

and the ridge in the drum which made it so difficult to get the drum off
close-up of the handbrake cable connection to one of the brake shoes
shows the movement of the brake shoe with the handbrake pulled on
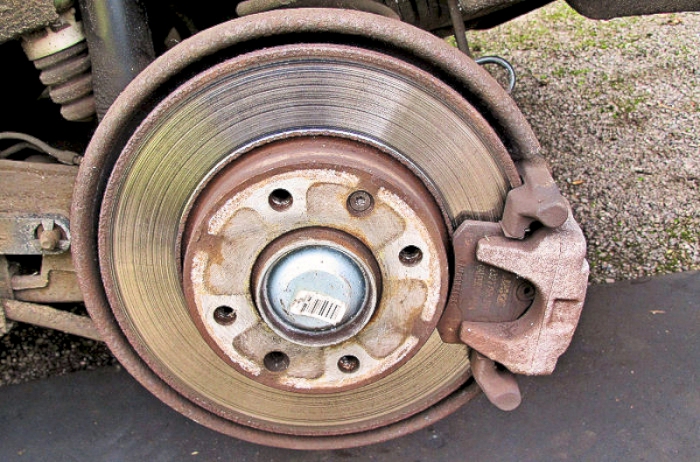
Changing rear brake pads - disc brake models only
This is an unusual design of combined disc brake and handbrake. The disc brake operates normally as you are used to BUT the handbrake ALSO pushes the same pads onto the disc.
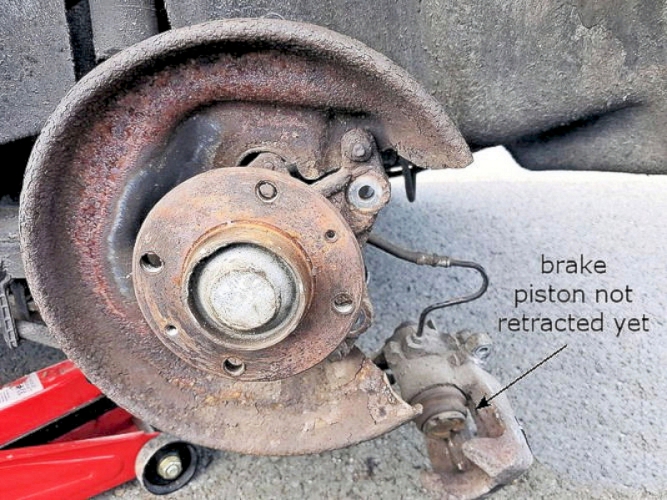
To do this the brake piston pushes the pads into contact by the hydraulics as in normal foot braking BUT can also be pushed into contact by the handbrake mechanism. The piston is actually two pistons, one screwed inside the other on a thread. As the handbrake cable pulls the lever on the brake backplate, it initially rotates the inner piston so the outer piston is forced outwards against the pads.
The clever bit is that, when the handbrake is released, the outer piston remains screwed partly out of the inner piston. The next time you operate the handbrake or footbrake the pads are already almost in contact with the disc. So the design not only saves the complexity of a separate drum handbrake system, but is also self-adjusting.
SAAB's had this system back in the 70's and it caused some worries though it worked well in practice.
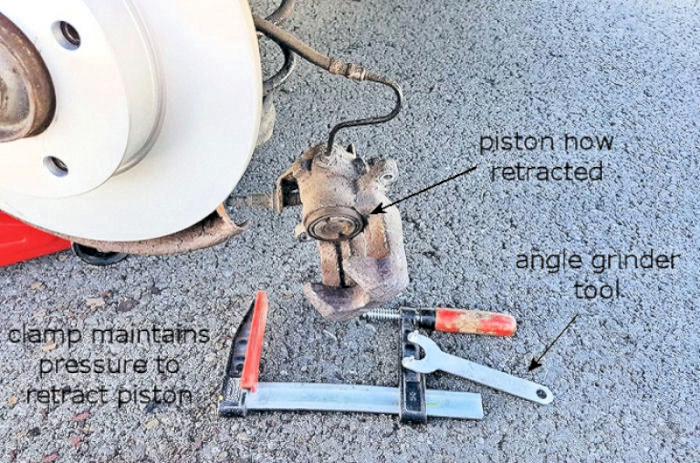
The problem comes when you need to replace the pads - put simply, the outer piston has to be screwed back into the inner piston to give space to put the new pads in. The piston has two holes to help you to rotate it back. Nothing fits! - however Mike Lawrence has discovered that an angle grinder tool, the one you use to tighten the disc onto the grinder shaft, fits exactly!
However the piston, though rotating readily, does not want to retract into the rear piston without some mild but at the same firm and steady force pushing it back in - this can be done with a G-clamp to gently push the piston.
This Laser Tools 1314 Brake calliper Rewind Tool is designed to apply the force and rotate the inner piston. It looks to be designed for the job and has many positive reviews (now including my own).

Drawing shows the two Torx45 bolts that have to be removed to take the calliper off - they will be ultra-tight so make certain you have a really good set of ½" Torx drivers and plenty of leverage!
Ignore the 13mm bolts that may come with Brembo pads; these don't need changing!
Old pads and discs were decidedly past their replace-by date. Though still MOT-legal, the handbrake was pulling up noticeably higher, suggesting the auto-adjuster had run out of adjustment. You might dismantle the calliper , however I found it easier to remove the whole calliper complete with pads.
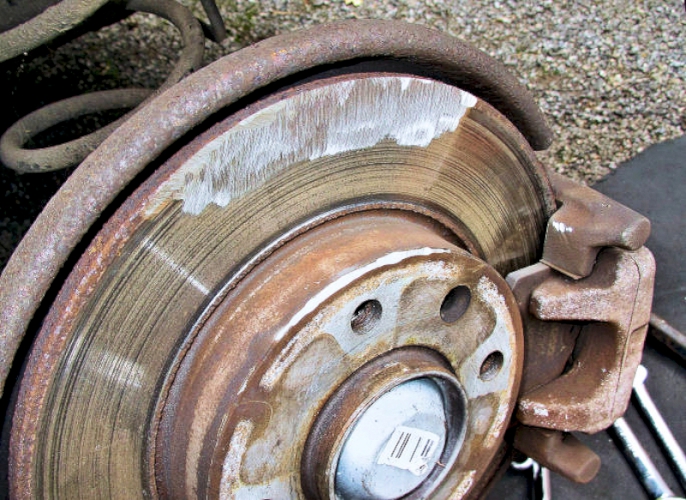
As the pads are kept almost in contact with the disc, it is not possible to push the pistons back as with conventional disc brakes. As the disc was badly worn, it was necessary to grind away part of the raised outer edge of the disc in order to get the calliper off. Then rotate the disc so the calliper slides off complete with pads over the ground-off section.
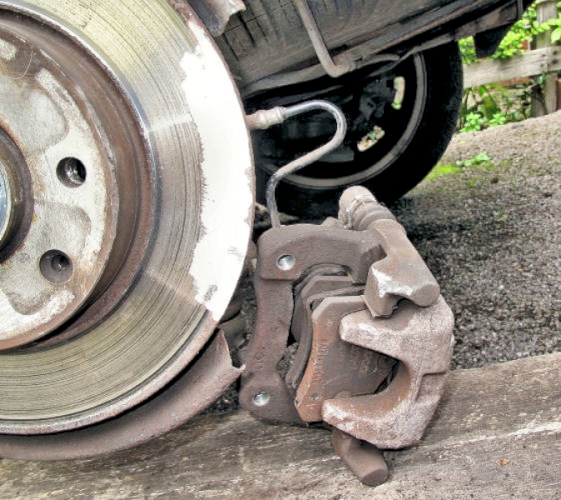
calliper off (careful with the rubber brake pipe; support if necessary)
Remove the T30 countersunk screw and the disc - may require some tactical help from a hammer!

The rear ABS sensors are very close to the reluctance ring that rotates with the hub.
Normal testing methods may not work as the resistance is variable and polarity conscious. The sensor is a Hall Effect sensor reacting to the magnetic field from the reluctance ring. I tried measuring one of my spares but couldn't get any sense out of it! It depends on the voltage too - a digital ohmmeter works at lower voltage than an old fashioned analogue meter.
Wind the piston back into the brake cylinder using one of the tool alternatives.
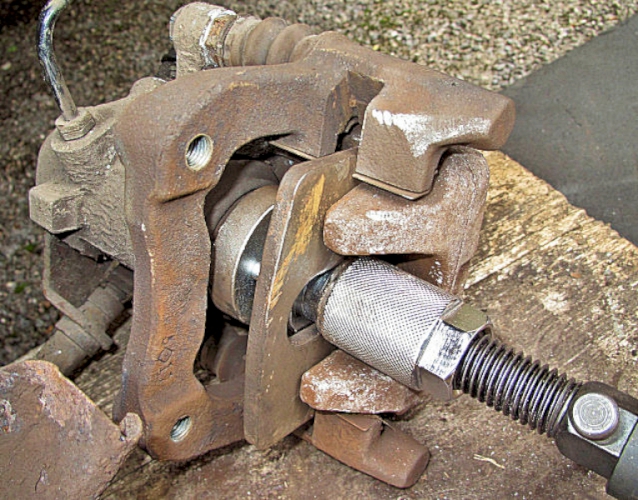
Using the Laser tool (see above) - the piston is quite stiff to wind back and I needed modest extra help from a breaker bar (just out of picture) to wind it back. Quite a number of turns needed but it does come up against a stop when fully retracted. Note that the metal support piece is too large for this small calliper ; it might be cut down to fit better.
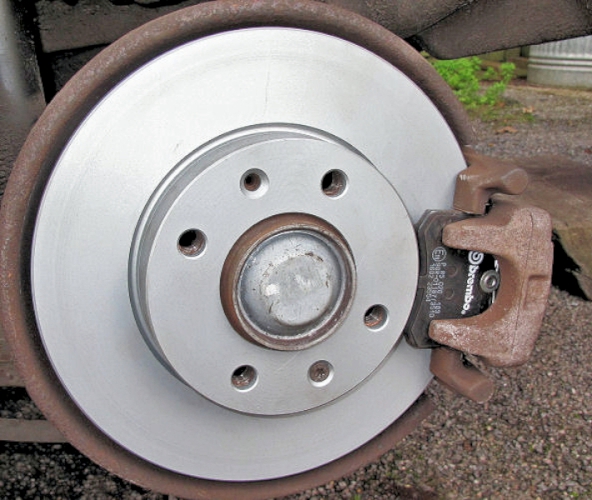
Replace the rear brake disc (retained with just one screw in this picture)
Reassemble the new pads into the calliper and slide the calliper back on to the new disc. Bolt the calliper up to the hub with the two Torx bolts - tighten well!
Replace the wheel and pull up the handbrake lever a number of times until the brake comes on firmly when the handbrake lever is pulled.
Check the brake fluid level under the bonnet in case it has risen too high.
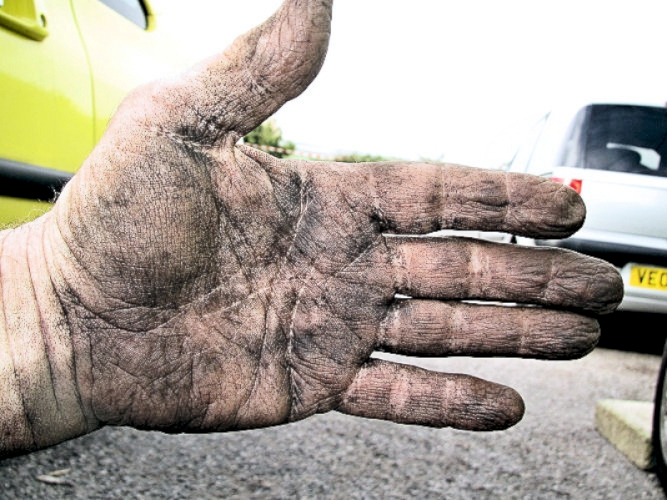
Have plenty of Swarfega available to clean hands - I used nitrile gloves for the other side - much cleaner; in fact very clean!