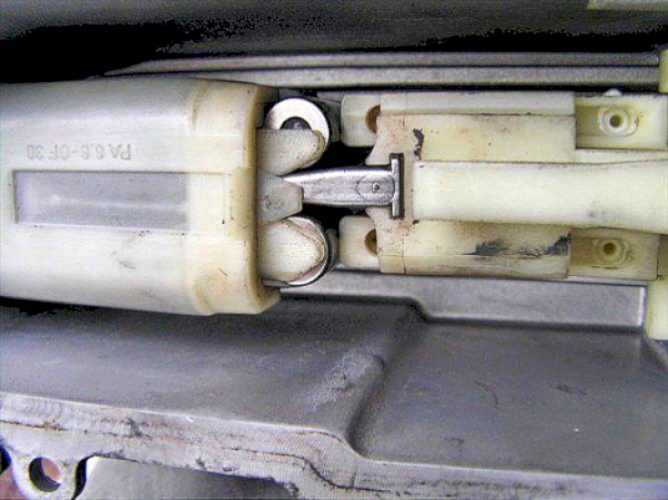
Automatic Clutch Actuator
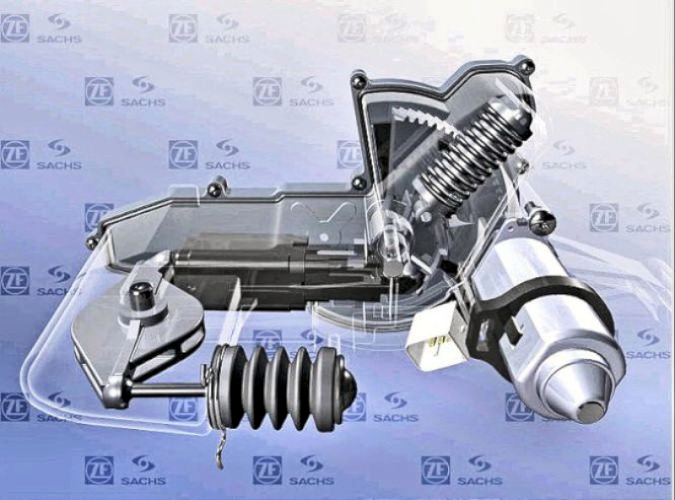
this shows the internal operating mechanism
Low mileage and little use is not good for these cars - the Molykote G-Rapid paste used in the clutch actuators has a limited shelf life - see here so the grease in an actuator made in 2005 will be well past its sell-by date! Many of these actuators last for many miles, some not so long! Mine seems good at 70,000 miles (January 2023)
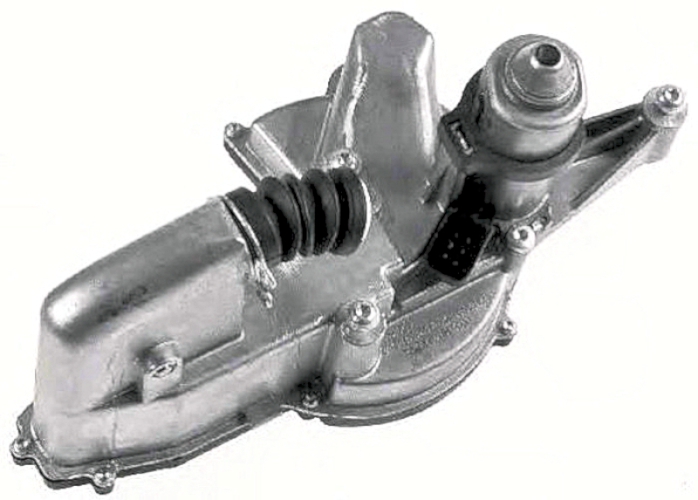
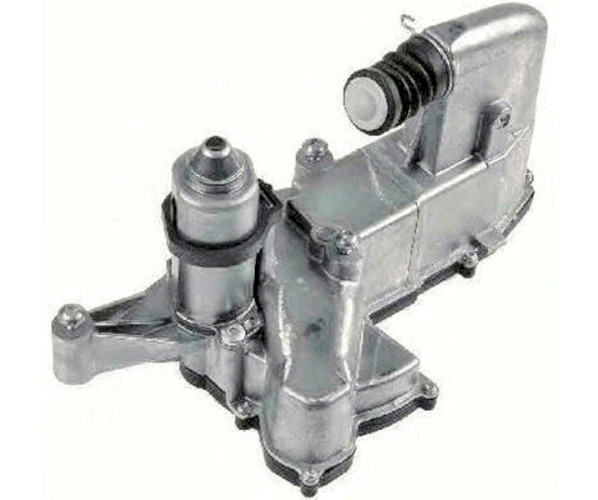
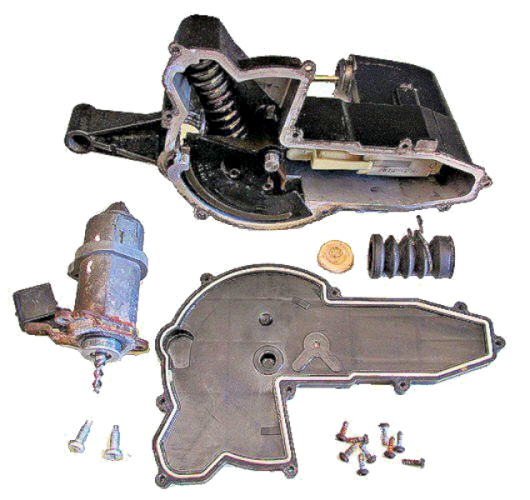
2-Tronic Clutch Actuator (pictures from a scrap one)
the conventional clutch is electrically operated via an an electric motor in a special actuator unit controlled by an electronic control unit.
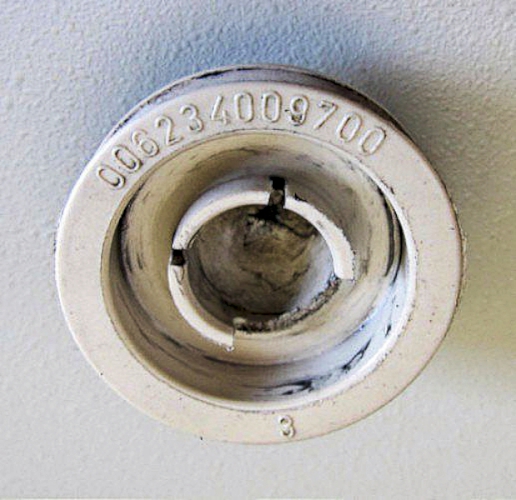
The actuator comes under many numbers - which appear to be interchangeable:
CITROËN: 218252, PEUGEOT: 218233, 218252, 9649394580, 9656382080, SACHS: 013981000004, 013981000028, 013981000032, 013981000089, 013981008001
see here for a video showing the internal mechanism of the clutch actuator
see here for a video showing the timing of the clutch actuator
The Creak!
the push rod to clutch release lever contact might cause a creaking noise as it operates, though the clutch continues to operate normally.
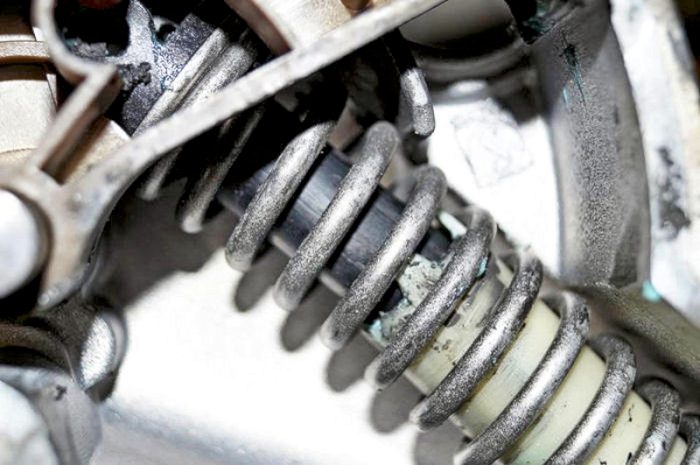
Mike Lawrence noticed scoring on the spring guide.
He is sure this is where the creaking is coming from as when rotating the mechanism and so compressing the spring the actuator was giving out an almighty creaking. The lack of grease will be helping with this noise.
This would explain the reason the "creak" never seems to get any worse - or parts wear out or fail.
Clutch actuator failure.
We are hearing recently of a few drive pinions on the motor shaft breaking. The motors take quite a hammering as they operate from a powerful motor every time the car changes gear
The self-adjuster inside the clutch actuator
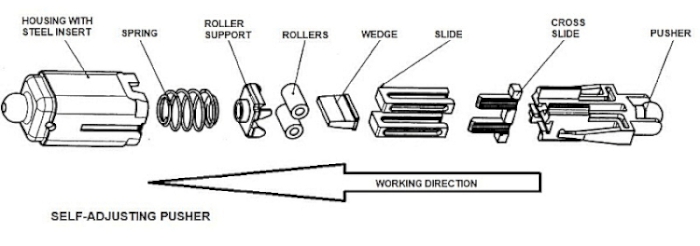
This is an exploded drawing of the internal self-adjuster.
The clutch actuator is self adjusting to compensate for gradual clutch cover & pressure plate wear.
Because of this, if an actuator is removed it is almost impossible to refit without destroying the internal adjusting mechanism. Refitting a used clutch actuator with a new clutch will nearly always result in a ruined actuator.
So, when fitting any actuator, remove the bottom and set the auto-adjuster back into its closed (shortest) position.
Kishorelal Deva says: "I recently had to reset my clutch actuator and found an easy way to do it. I regret not having taped it as it is difficult to describe. The upshot is that the plastic part with the two ball bearings can be removed. The ball facing the gear has a little clip underneath it and it can be pushed out using a flat screw driver. Then it is easy to remove the entire plastic adjuster. Now place the adjuster in a vice and insert the center metal grip into position and push the plastic parts over it. Now push the two roller bearings down with the plastic and get a friend to use a cable tie to keep the mechanism in place. The gear in adjuster can now be pushed with a flat bar till it clicks into position as shown in Jim's photo. Now the plastic mechanism can be inserted taking care to twist it so that the clip at bottom goes in. Once that is in place the ball at the back can be pushed in and the cable tie removed."
Neil Gibson says: "These adjusters can be moved in the palm of your hand, once you understand how they work! And when the actuator is fitted it is in the fully extended position. During operation, taking the pressure off the clutch arm allows the steel wedge between the rollers to move back, allowing the adjuster to move."
Then use PP2000 to learn the clutch position. gear selections take about 10 mins to re-program.
Always use a battery charger or the car to maintain more than 12.5 volts whilst programming.
Alternatively - here is the workshop .pdf file
Discussion on the internet:
Q: Is it an idea to buy a used actuator or should I just pay up for a new one?
A: I would fit used, but each time I remove one, I always strip it to set the adjuster into the "off" position.
To fit you will need to remove battery box and air filter, then there are 3 Torx screws, loosen them a little and the actuator slides off.
Then program it all up with PP2000 for Peugeot. This sometimes takes a few attempts, it doesn't seem to be an exact science, but I don't think it will reprogram with faults in.
My own thoughts: I haven't done this myself though the time is sure to come.
I am fairly certain that you can get away without the special tool by simple measurement. The actuator is on slotted holes and you should be able to check up the clearance to the clutch lever before taking the old actuator off.
I would expect there to be a small gap between the actuator and the clutch lever (as in manual clutches) but am not absolutely certain of this. Others have found that a new actuator (not a used one) will mean that the automatic adjuster in the actuator is able to take up any slack and end up in the right position.
If it is a second-hand actuator you have to be more careful to slacken off the automatic adjuster before fitting it.
The clutch actuator is fastened with 3 hex screws to a frame with slots in the mounting to allow for initial adjustment. Generally speaking a new clutch should have the new or reset actuator mounted as far down the slots as it will go. For worn clutches, the new or reset actuator should be mounted nearer the start of the slots. If the clutch is where the ecu expects it to be gear changes will be smoother and faster.
Reset the Adjuster
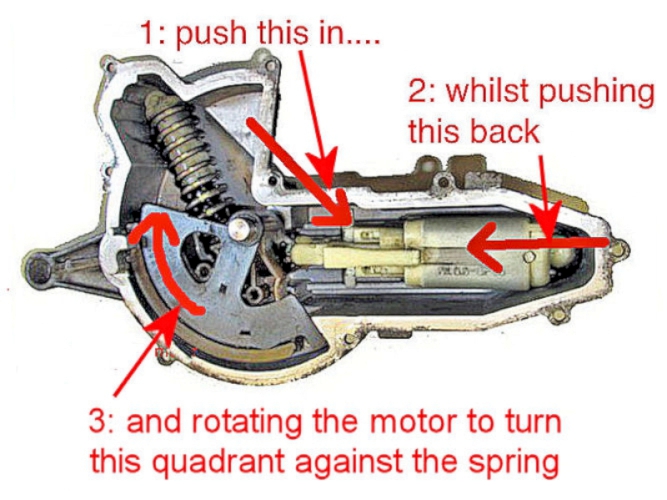
whenever you refit a clutch actuator, take the bottom cover off, and wind the quadrant 90’ to the right, where it will sit until you initiate the transmission. You can make up a tool to do it, or faff with a screwdriver.
it is also important to reset the auto-adjuster whenever the clutch is changed as the setting point changes
What's inside the actuator?

the motor and push-rod comes off easily - the case is actually bright aluminium not black as it may appear!

the plastic/fibre base comes off easily -
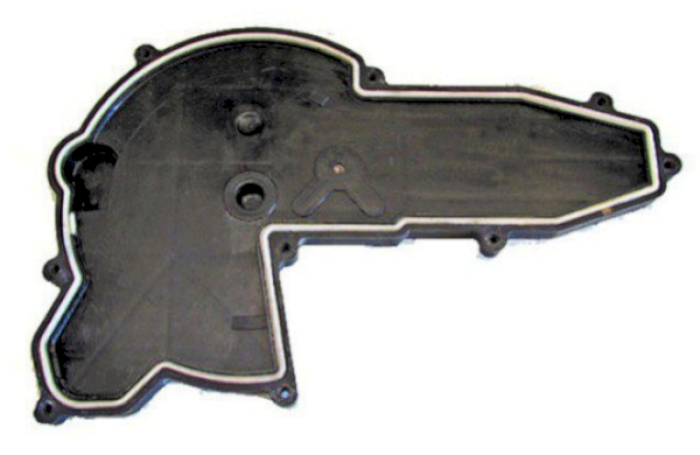
- it might be drilled in situ to push in some silicone grease if necessary?
The actuator can be partially dismantled for lubrication - as they are nylon parts use silicone grease.

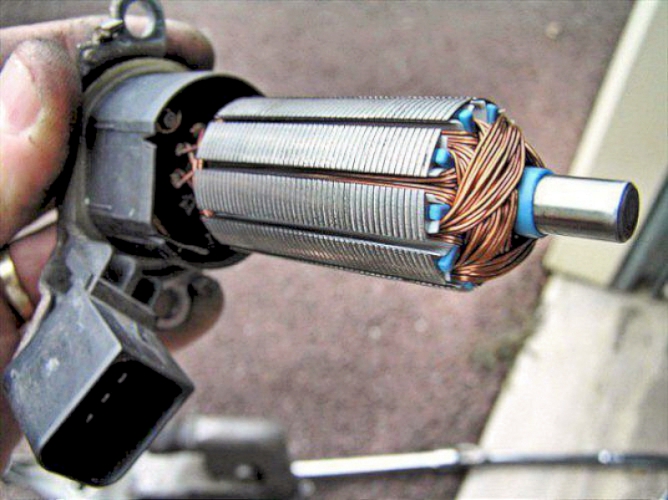
the motor is a compact unit which includes feedback potentiometers to tell the ECU where it is. Pins 3& 6 connect direct to the motor if you need to test it.
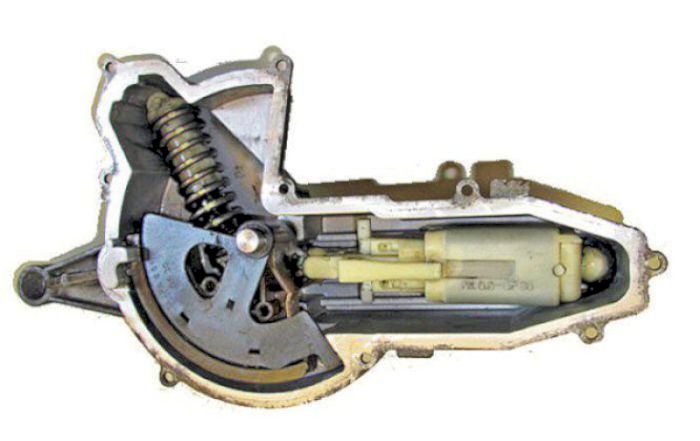
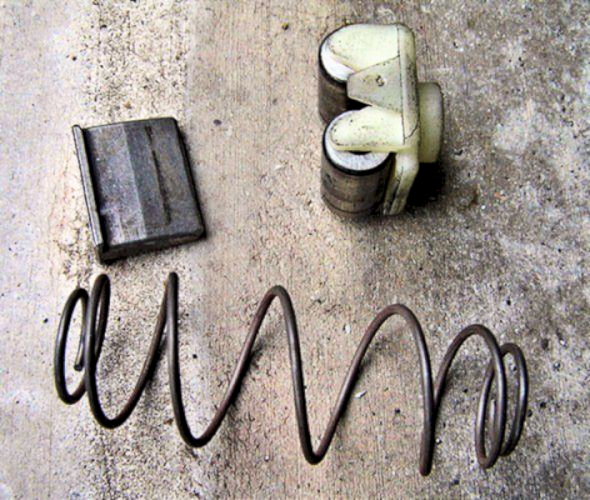
the inside of the actuator. Don't take any more apart than this as that spring (which is intended to balance the effect of the clutch through the clutch lever) is very strong!
the self-adjuster can be carefully dismantled and cleaned (see below).

the push-button that connects the push rod to the clutch lever shows signs of distress on both sides -
- one of the socket quadrants has broken off though it still holds the pushrod ball securely
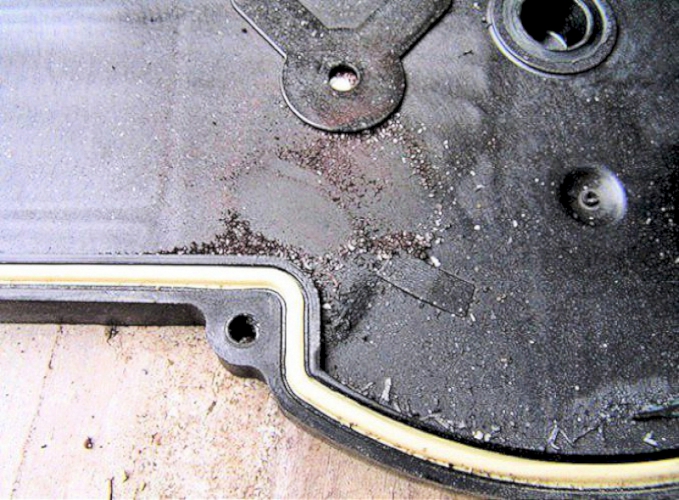
Pictures from Geoff who went further . . .
there was a suspicion of rust particles from the self-adjuster in the cover
the self-adjuster connects the main motor quadrant and the pivoted push-rod that pushes on the clutch arm. This adjuster has been extended for the photograph.
the adjuster assembly can be pulled apart after the cover is taken off. Just work the adjuster action until the wedge action frees and then lift up the holding tag to separate. There is enough room to remove the steel dowel and the rollers will pop out with the spring behind. It's simple and will not break so long as no force it used. You do not need to pull the ball knuckles off (too risky anyway).
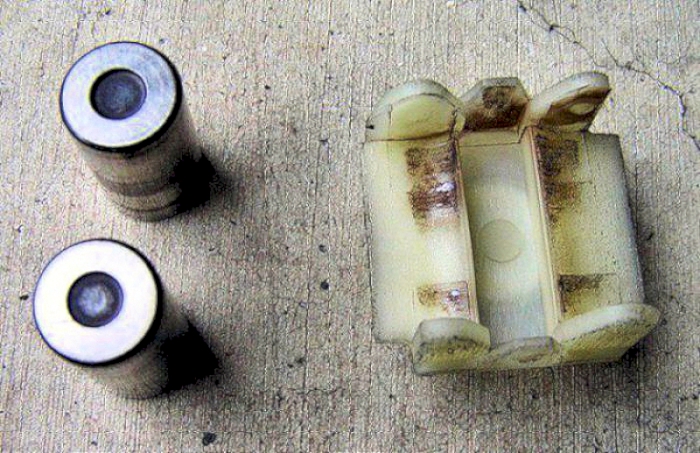
the self-locking is achieved by the wedge pushing against the two rollers by the light spring inside.
I stress I haven't done this myself, but I would GUESS that the adjuster should be reset to be as SHORT as possible. That should mean the clutch actuating lever is initially withdrawn away from the clutch fork - leaving a gap.
Think back old-fashioned mechanical clutch actuation - with a new clutch you adjust and withdraw the actuating lever as far back as possible then adjust it back up so there is a small gap between the clutch lever and the fork in its new position.
When the actuator then goes through the PP2000 reset procedure I believe the auto-adjuster works in much the same way. It lengthens by means of the internal spring (and locks in the new position) so it sets the actuator operating lever to have a small clearance to the clutch fork.
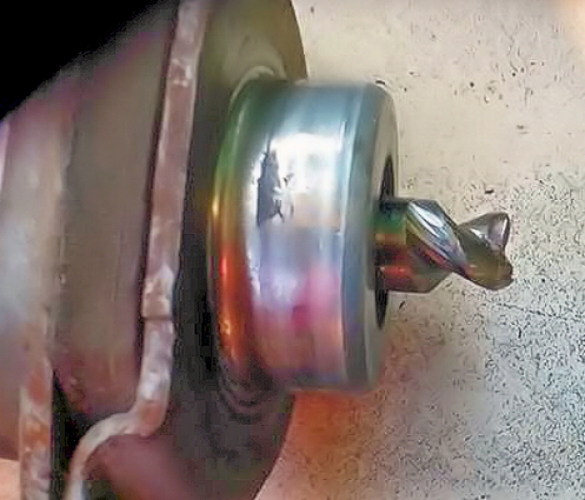
the rust appears to come from the four steel plates lining the walls of the female side of the adjuster. Not a good sign as the wedge will pit over time and find it's own lock point. A fine film of grease may hinder the wedging function, allowing slip - but will also prevent further corrosion.
Gently separate the brush block enough without disengaging the brush gear and blow it out - you may be surprised with the build-up.
There should be no need to press off the sensor block as Hall effects are either working or not. The correct way would be to pull the armature away in case metal filings remain on the sensor heads.

the well-made motor dismantled - there are hall-effect transducers near the commutator and brushes
once the motor is removed, just lift the two tags enough to slide off the housing. This motor uses brushes for the motor and the sensors are built into the body of the black nylon. The sensors are under the brush gear.