
Prop Shaft & Rear Axle
May 2004:
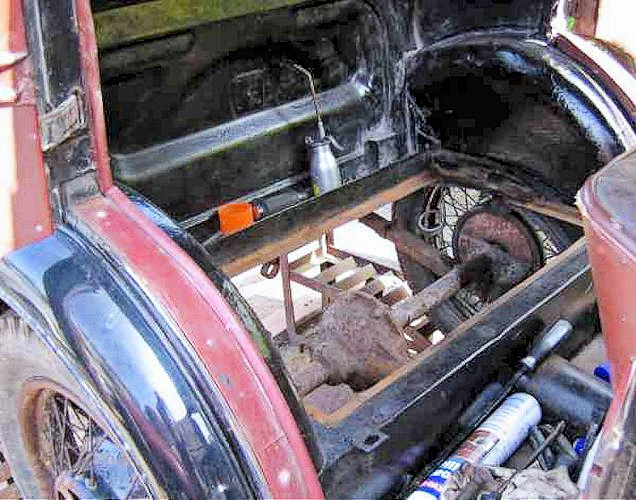
After removing the board underneath the rear seat it was an easy job to remove and refurbish the rear dampers.

The very dry rear springs were oiled using spare ATF as it seems to creep well between the spring leaves. After a few days it had soaked in and very little was still showing!
The axle requires non-EP SAE 140 oil - Castrol D is fine. EP oils have additives that can attack the bronze bearings inside the axle.
The axle was filled up using a gear oil bottle as my oil gun wouldn't fit in the rather small filler hole. Even then I had to take the end off the plastic tube.

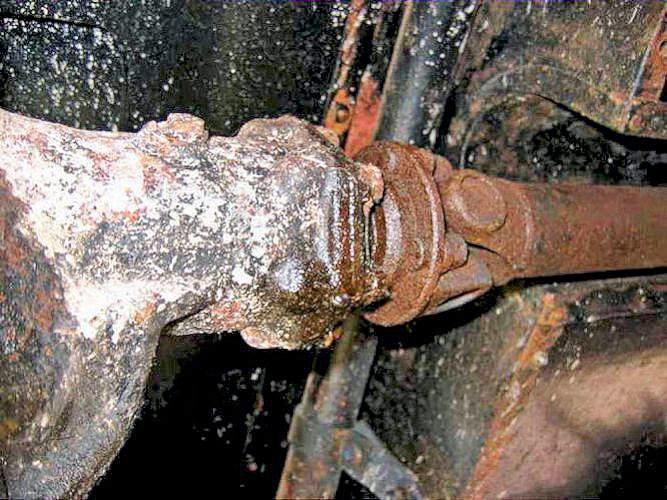
The UJ's in the prop-shaft are the "sealed for life" type with no grease nipple. They still appear OK but I ran engine oil over them - they soaked it up!
Don't forget that there is a grease nipple for the sliding splines. Access either under a plastic cover on the transmission tunnel or from underneath.
April 2006:
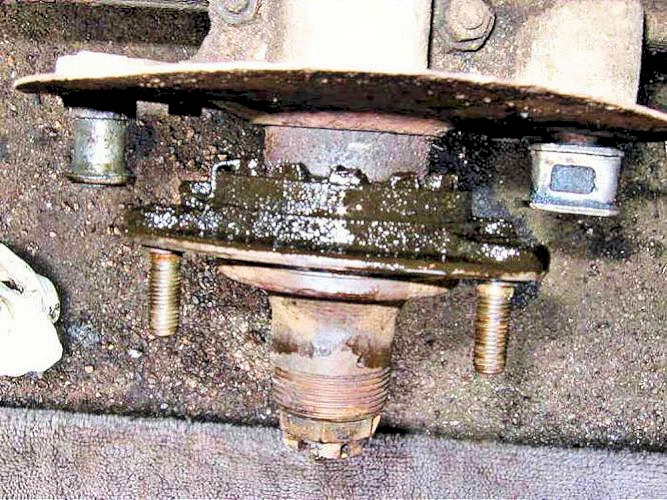
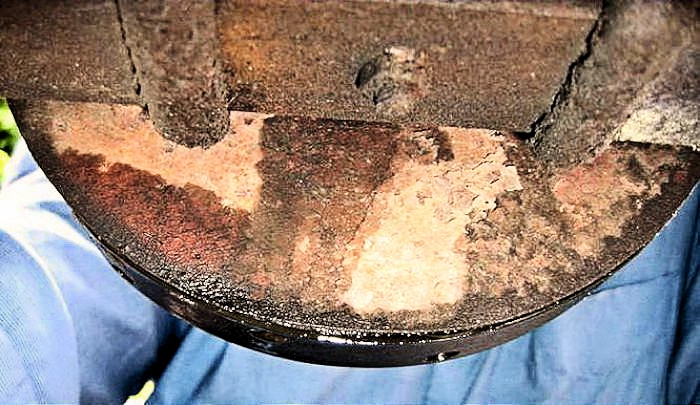
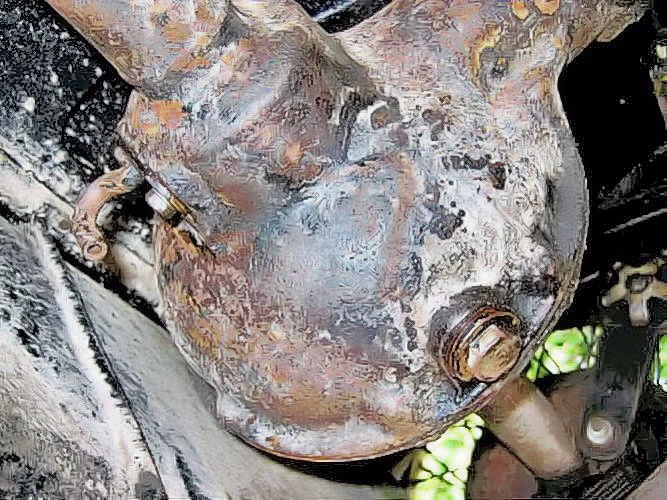
When changing the rear brake linings, I discovered that one hub was leaking oil onto the linings.
When changing the rear brake linings, I discovered that one hub was leaking oil onto the linings.
no oil on the outer side of the backplate suggested that the oil seal was still doing its job and the leakage was past the threads of the castellated nut.
and was it a mess!
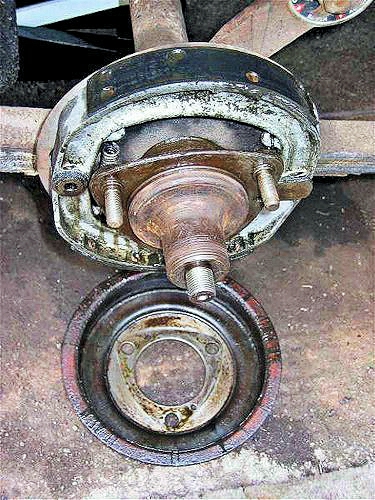
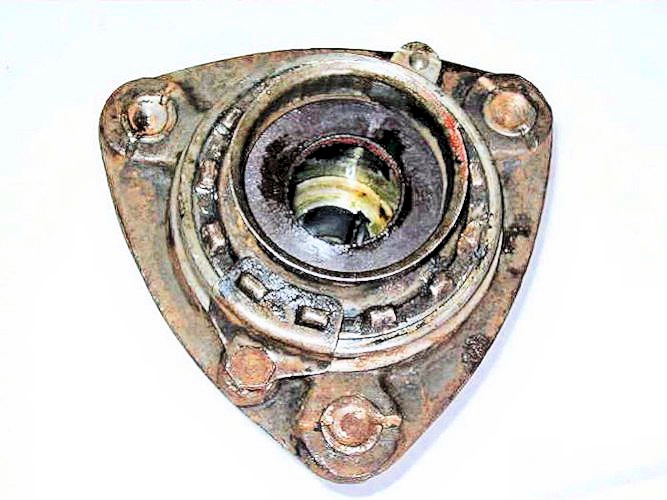
While the tools were out, it was easier to change both seals - this is what the axle ends look like when the hub is removed.
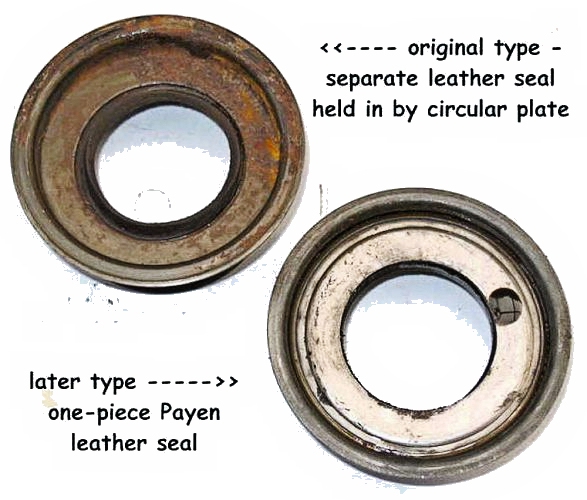
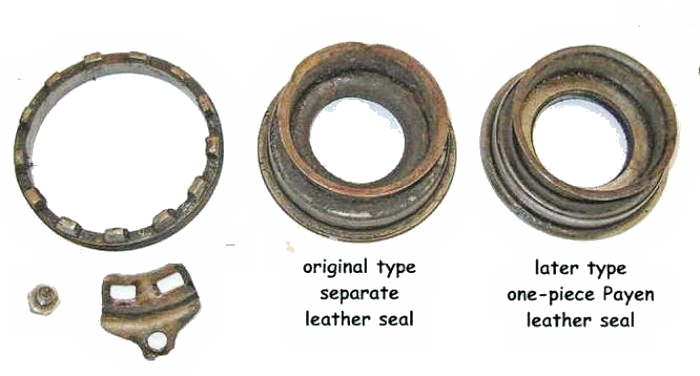
There are two types of seal - the original Austin design was a flat leather washer clamped between an oil seal plate and the oil thrower and the later one-piece Payen type which fits into the oil thrower.
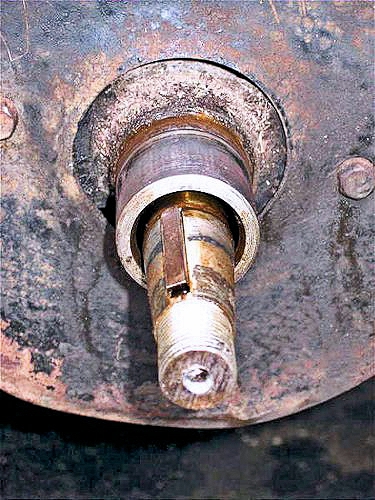
The bearing and seal assemblies are held in the hub by the large castellated nut - this is locked in place by the special tab washer.
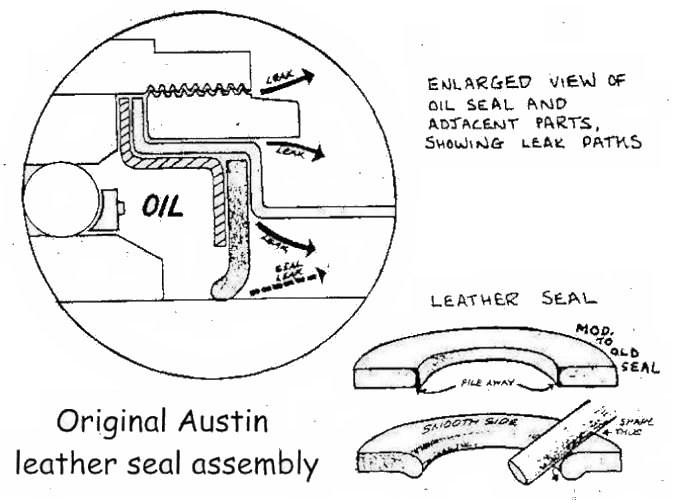
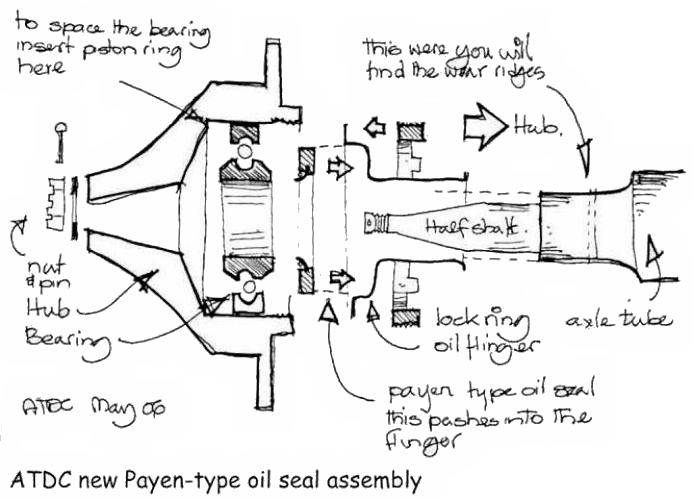
these two drawings from the ATDC show the details of the oil seal assemblies:
If you have the later Payen type seal fitted, be aware that the oil seal plate will no longer be available as it will have been thrown out with the original Austin flat seal. I was fortunate in that my car came with an original hub complete with oil seal plate so I could still use the original Austin design seal.
The new seal (of the original Austin type) is a simple flat leather circular washer.
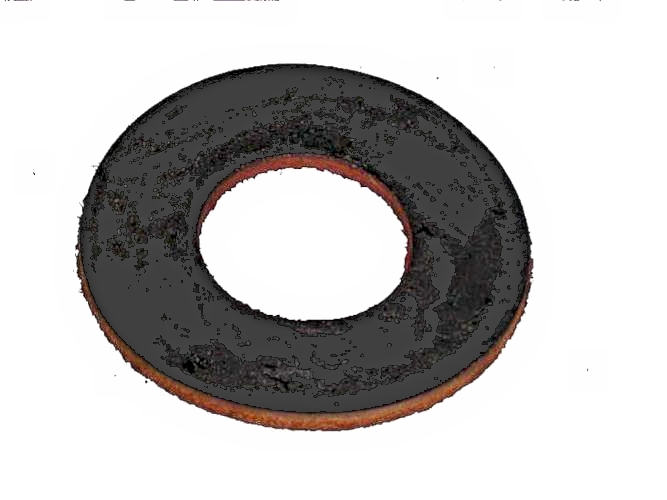
This is clamped tight between the oil seal plate and the oil thrower when the castellated nut is tightened.

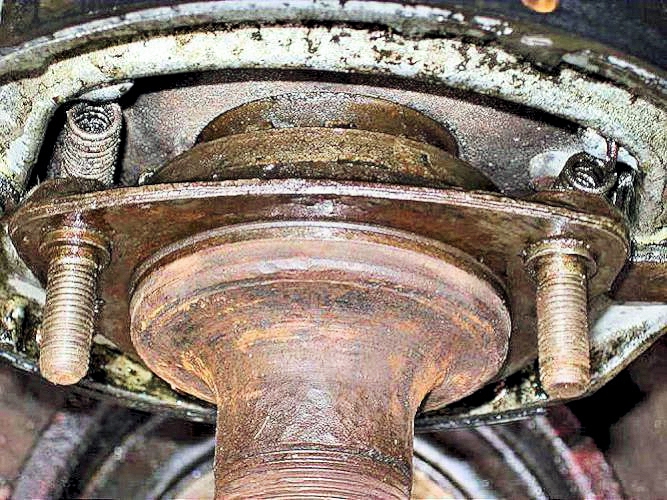
With the hub and brake shoes removed, the backplate is very simple.
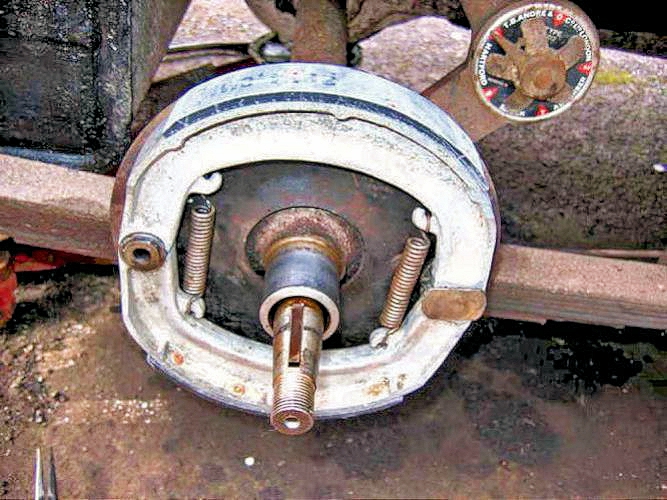
Put the brake shoes back in place after checking that the axle end where the seal rubs and the wheel bearing sits, is clean and free from burrs or grooves
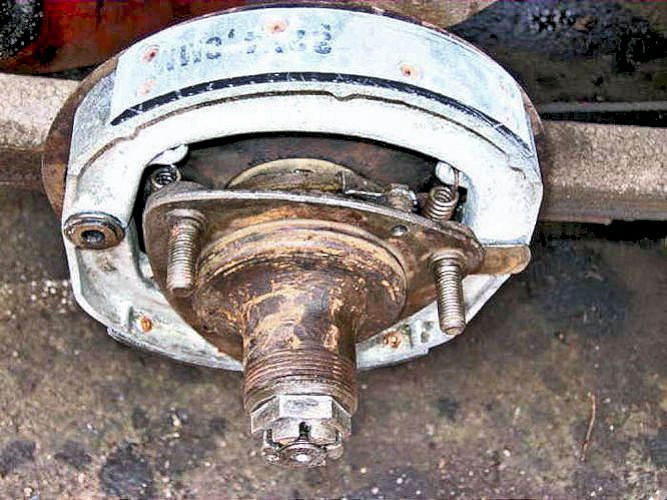
Now the hub goes back on - with a bit of help from a mallet to push the seal back over the greased axle end.
followed by the castellated axle nut - on one side I had to turn a little off the end of one of the nuts so the castellations would line up with the split pin holes.
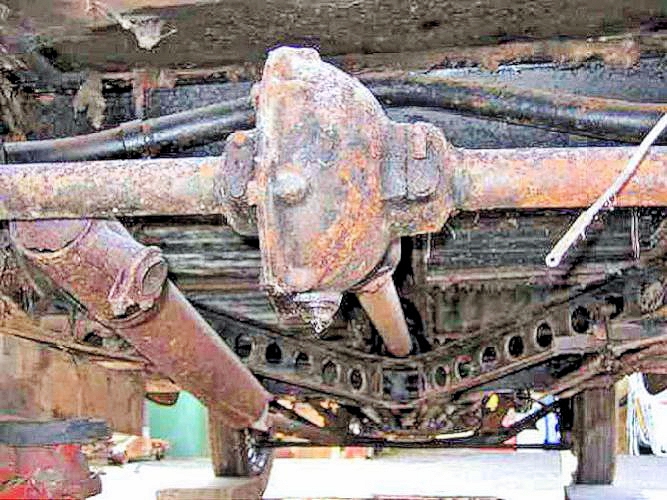
July 2006:
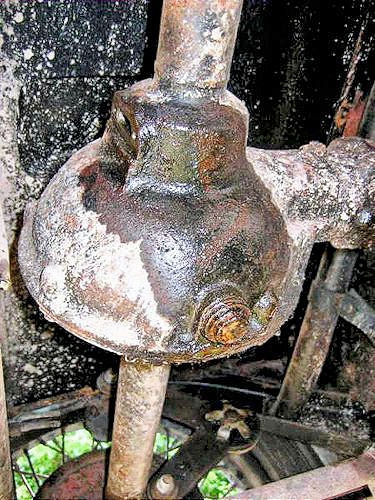
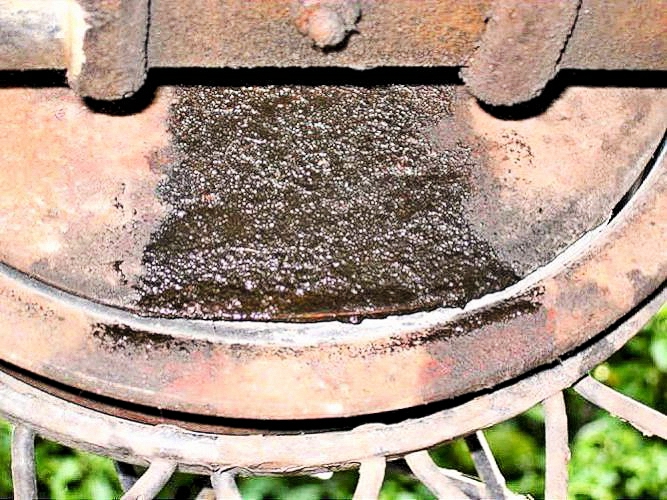
after a few hundred miles the axle was looking decidedly oily. It looks worse than it really is, a little oil goes a long way.
there was the normal leak from the nose seal
I cleaned up the axle and re-sealed the two small cover plates that lock the internal castellated nuts.
and after it was cleaned off it looked a little cleaner, however it is difficult to keep oil in these axles. No wonder they specified SAE 140 oil.
and a leak from the new nearside oil seal meant the seal hadn't sealed as it should. As the MOT was the next day, the hub assembly was dismantled again and the seal reseated in the housing with hylomar. The seal itself was OK, the oil had been escaping down the threads of the castellated nut.
After cleaning up - there have been no further leaks (June 2011).
March 2009:
Checking the oil - I found the level rather low, probably due to leakage past the pinion seal (but it is nearly 6 years since I last checked the level!). I used an old oil hand gun to fill it this time.
You can get a false indication that the oil is up to the filler/level plug. The SAE 140 oil takes rather a long time to drain down between the crown wheel and the case (warm the oil first) - be patient and allow the oil to reach the correct level before rechecking.